useNewRelic
| Package name | Weekly Downloads | Version | License | Updated |
|---|---|---|---|---|
@envelop/newrelic | Jun 26th, 2025 |
@envelop/newrelic
Instrument your GraphQL application with New Relic reporting. Take advantage of Distributed tracing to monitor performance and errors whilst ultimately getting to the root cause of issues.
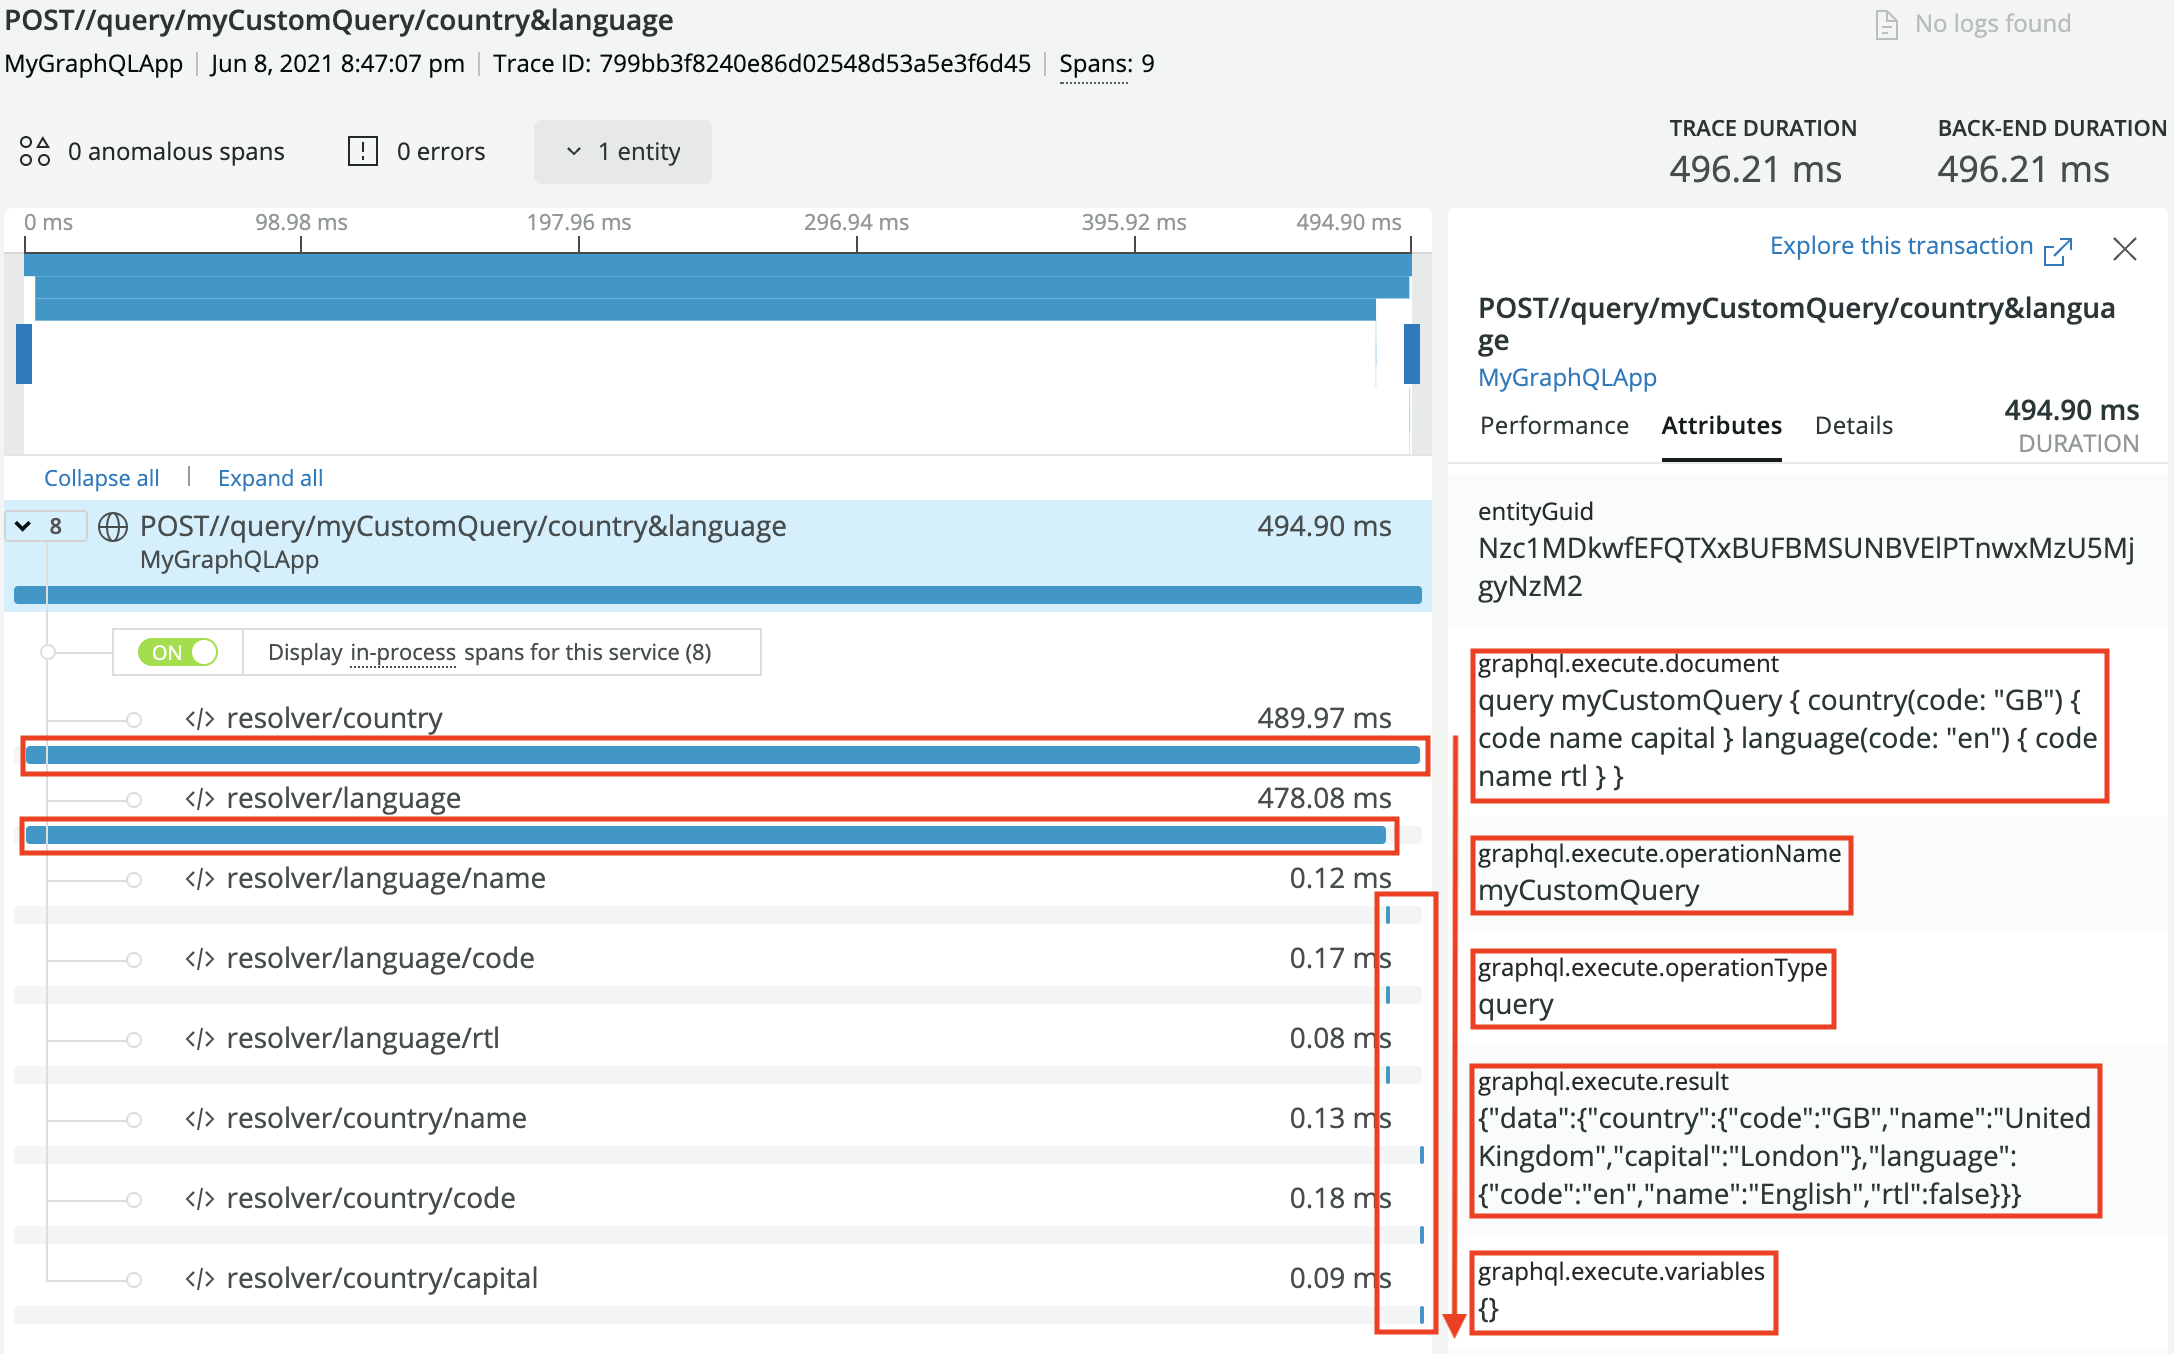
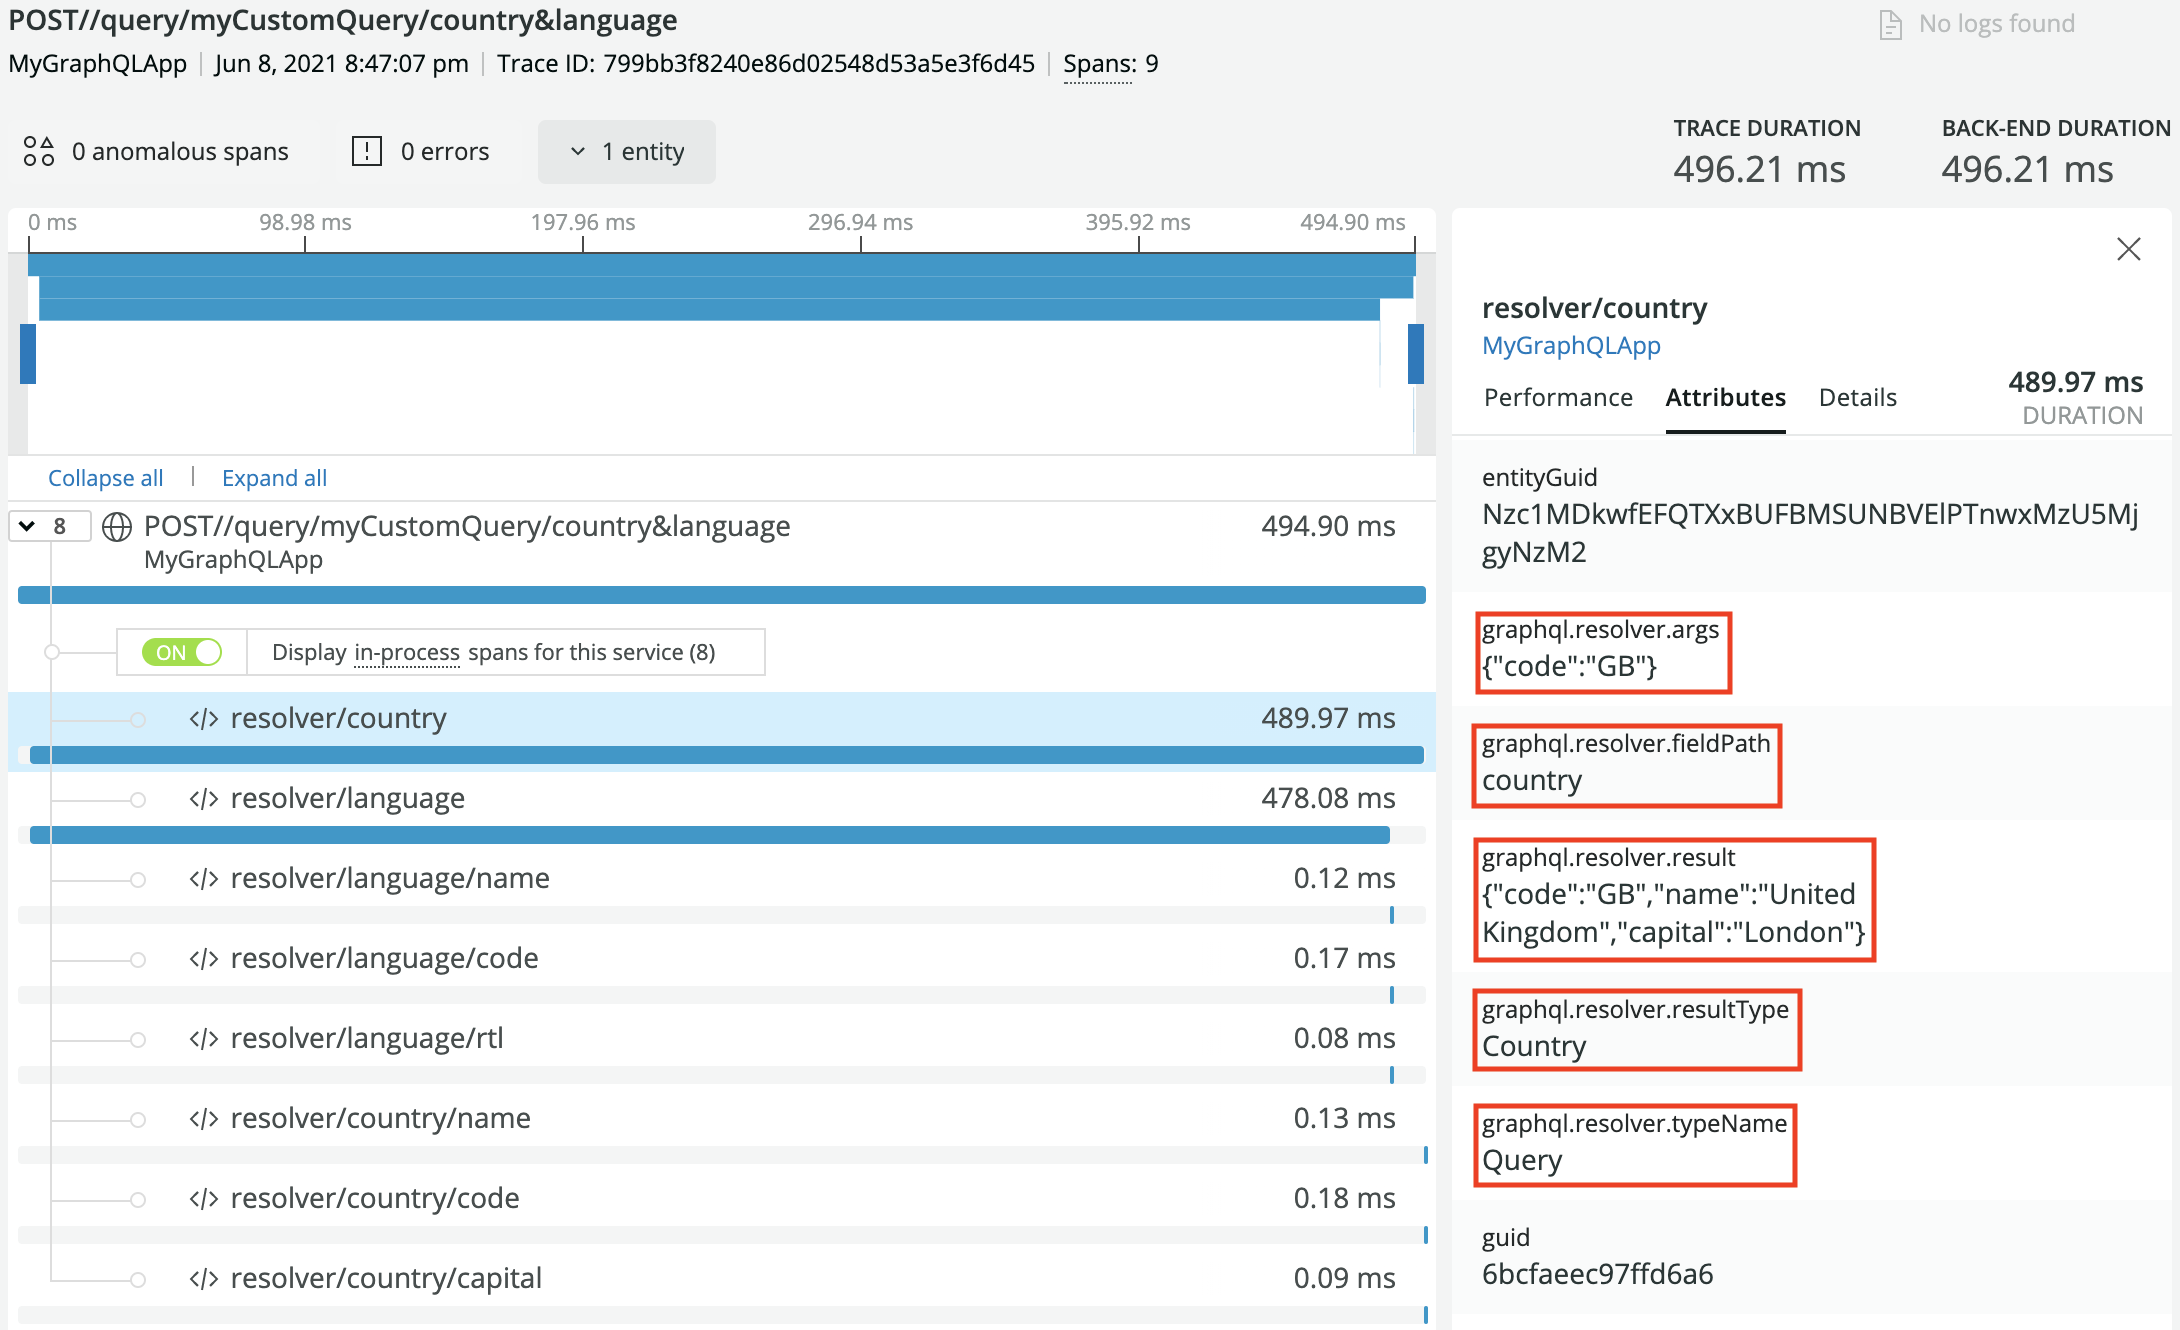
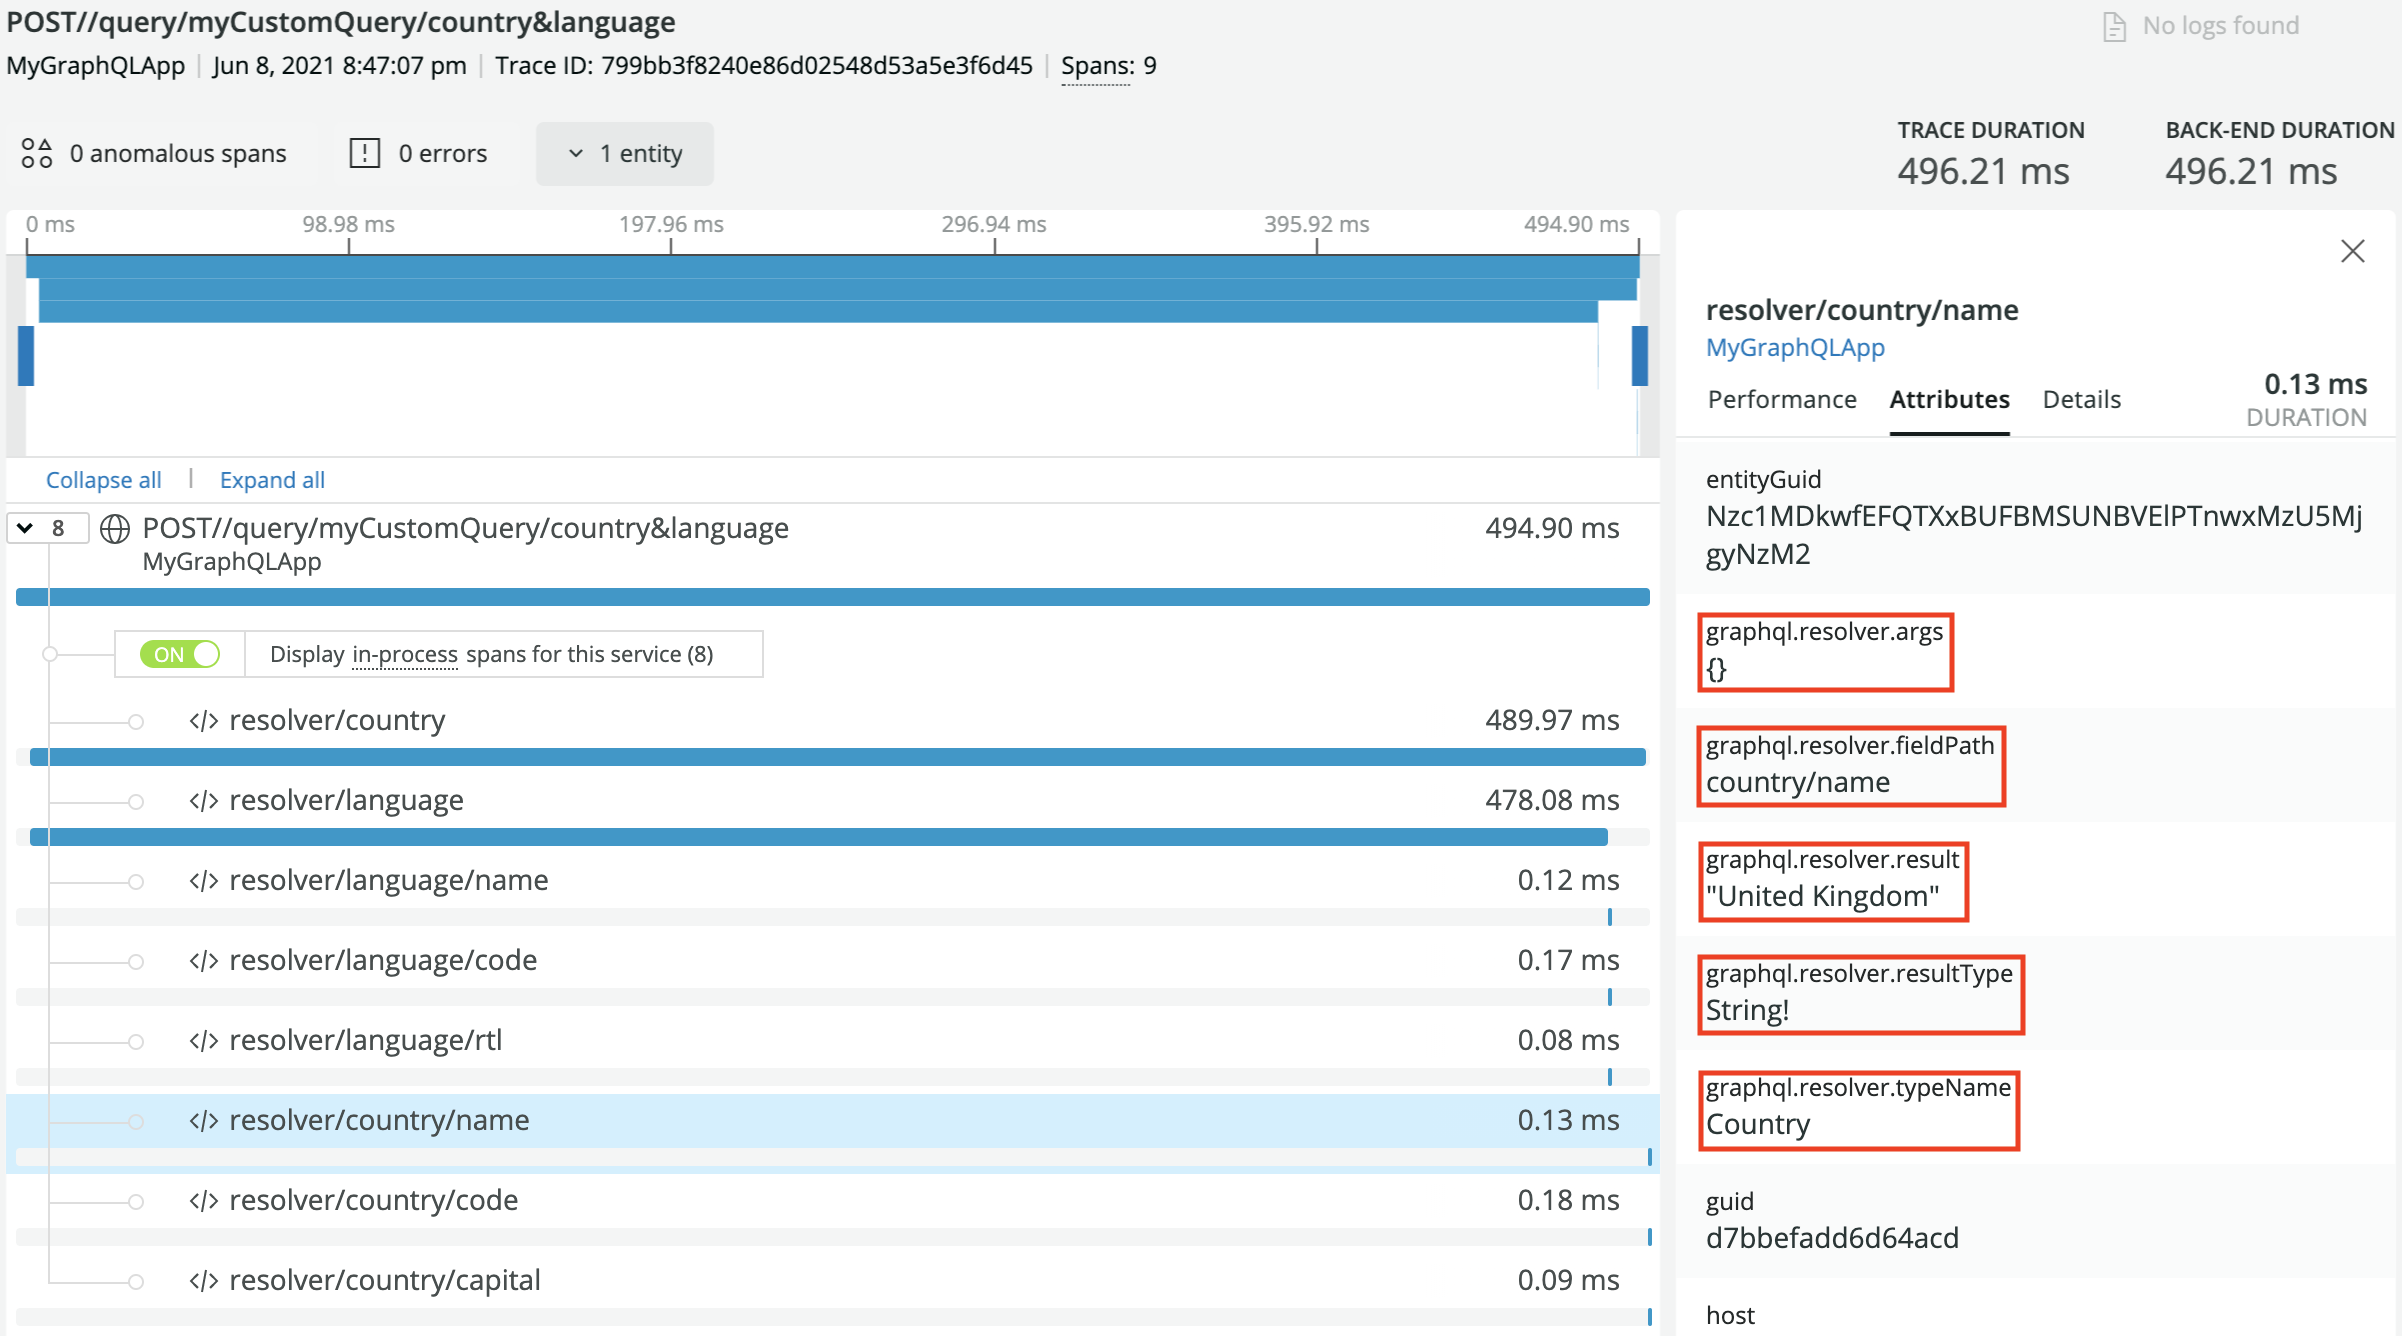
Below are some screenshots to show how tracking looks like in New Relic, in these examples all
plugin options were set to true.
Error tracking, operation and resolver views:
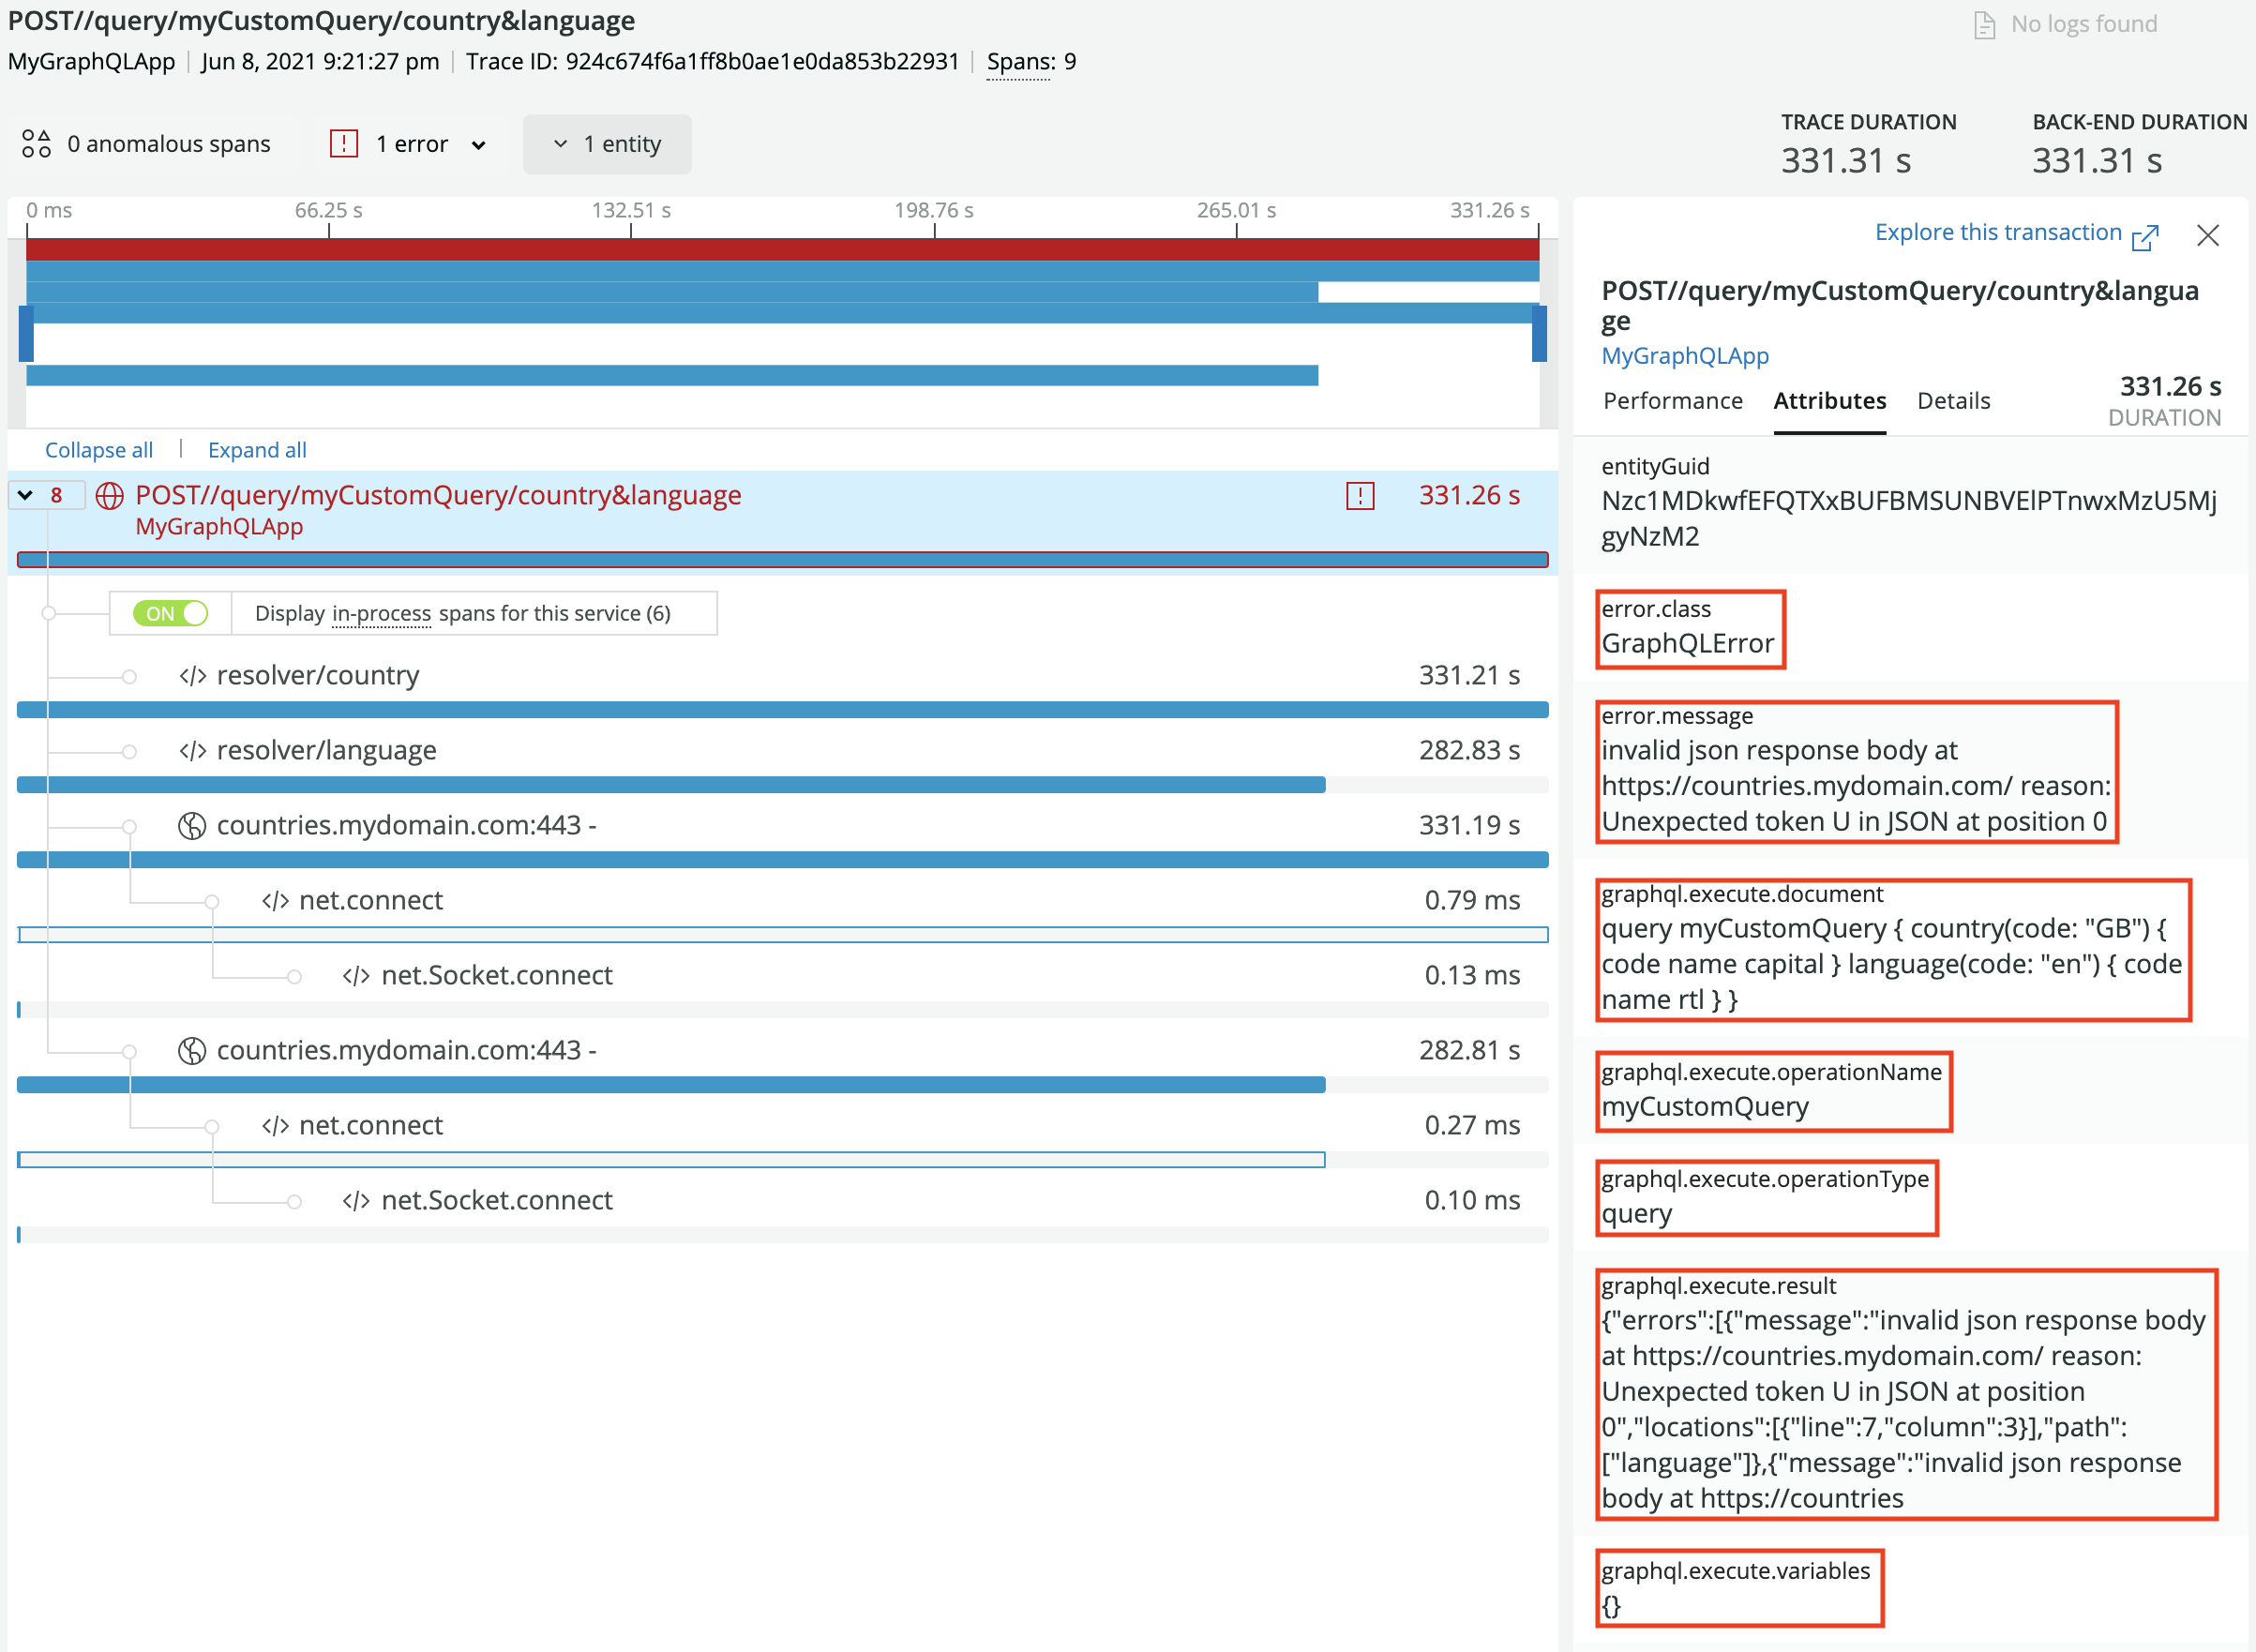
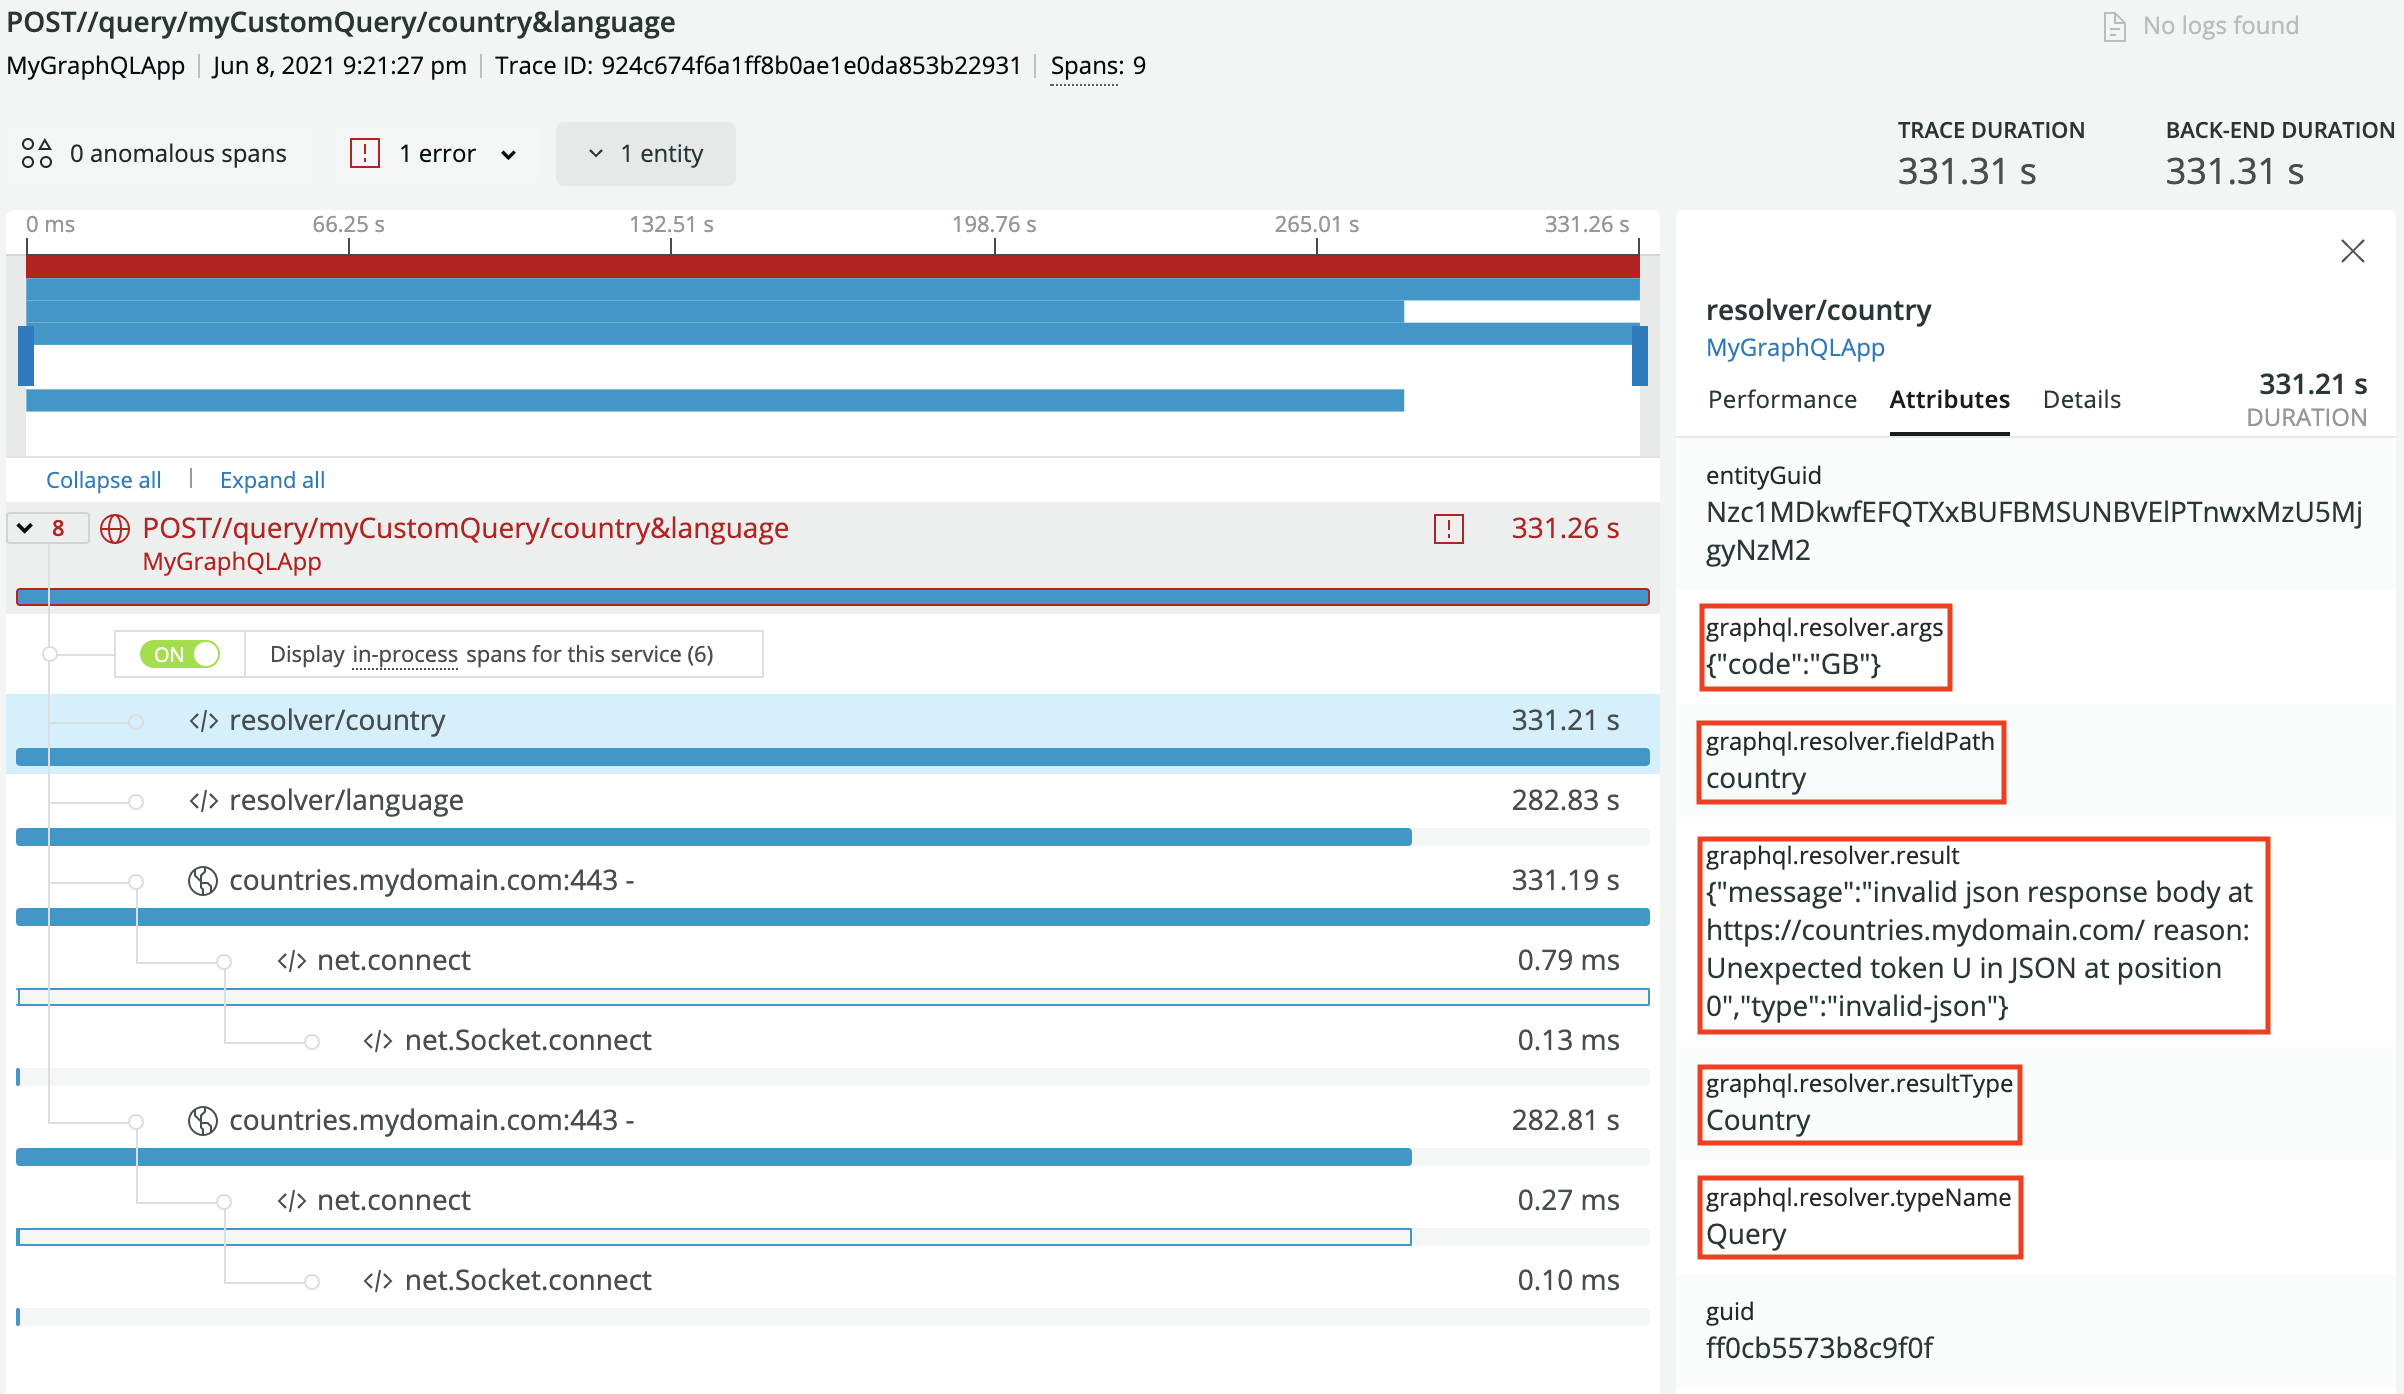
Successful operation tracking, operation plus root-field and sub-field resolvers:
Getting Started
- Install dependencies
- Configure the New Relic Agent
- Setup the New Relic Envelop plugin
Installation
This plugin expects the Node.js agent, newrelic npm package, to be installed in your application.
yarn add newrelic @envelop/newrelic
Basic usage Example
import { execute, parse, specifiedRules, subscribe, validate } from 'graphql'
import { envelop, useEngine } from '@envelop/core'
import { useNewRelic } from '@envelop/newrelic'

const getEnveloped = envelop({
  plugins: [
    useEngine({ parse, validate, specifiedRules, execute, subscribe }),
    // ... other plugins ...
    useNewRelic({
      includeOperationDocument: true, // default `false`. When set to `true`, includes the GraphQL document defining the operations and fragments
      includeExecuteVariables: false, // default `false`. When set to `true`, includes all the operation variables with their values
      includeRawResult: false, // default: `false`. When set to `true`, includes the execution result
      trackResolvers: true, // default `false`. When set to `true`, track resolvers as segments to monitor their performance
      includeResolverArgs: false, // default `false`. When set to `true`, includes all the arguments passed to resolvers with their values
      rootFieldsNaming: true, // default `false`. When set to `true` append the names of operation root fields to the transaction name
      skipError: error => {
        return true // a function that allows you to skip reporting a given error to NewRelic. By default custom `EnvelopError`s will be skipped
      },
      extractOperationName: context => context.request.body.customOperationName // Allows to set a custom operation name to be used as transaction name and attribute
    })
  ]
})
Note: Transaction and segment/span timings may be affected by other plugins used. In order to get more accurate tracking, it is recommended to add the New Relic plugin last.
Advanced usage
The plugin allows you to keep control over the variables and arguments that are tracked in New
Relic. In addition to the basic true/false boolean value, includeExecuteVariables and
includeResolverArgs also accept a RegEx pattern. This allows you to implement white and black
listing of properties to be tracked in New Relic.
This is particularly useful if you have properties coming through variables and arguments that are useful for debugging, but you don’t want to leak users’ data (such as PII). Below is a quick example of how you can use RegEx to set up white/black listing functionalities.
useNewRelic({
  includeExecuteVariables: /client|application/i, // whitelist, track only variables whose name contains "client" or "application" (e.g. clientName, applicationId, xApplicationId)
  trackResolvers: true, // track resolvers, since we also want to track resolvers' arguments
  includeResolverArgs: /^(?!name|email|password).*/i, // blacklist, track all arguments whose name does not match 'name', 'email' nor 'password'
}),
Obviously, the ones above are just a couple of examples, but clearly you have endless options to use any RegEx pattern to filter the variables and arguments in the way that best work for you.
Be aware that the only way to filter variables and arguments is to loop through them, so there is an O(n) cost when filtering, where n is the number of variables sent to the operation (when tracking execute variables), or the number of arguments passed to resolvers (when tracking resolvers arguments).
Agent Configuration
For full details about New Relic Agent configuration, we recommend reading New Relic’s official Node.js agent configuration documentation.
The main methods to configure the New Relic Agent is through:
- The newrelic.js file [or]
- The environment variables
If you choose to use the newrelic.js file, then you need this file located in the root of your application. You can look here for a basic example of what this file can look like.
If you choose to configure the New Relic Agent through environment variables, then you can follow
your preferred strategy to make sure the variables are set and available when your application
starts. The variables are the same you can set in newrelic.js file, you just need to know that they
need to start with NEW_RELIC_, obviously, the variables name must be fully uppercase.
The two variables that are always required are:
| Description | newrelic.js | Environment variable |
|---|---|---|
| Application name | app_name: ['MyAppName'] | NEW_RELIC_APP_NAME=MyAppName |
| License key | license_key: '40HexadecimalCharacters' | NEW_RELIC_LICENSE_KEY=40HexadecimalCharacters |
Other variables that are popularly used are:
| Description | newrelic.js | Environment variable |
|---|---|---|
| Enable distributed tracing | distributed_tracing: { enabled: true } | NEW_RELIC_DISTRIBUTED_TRACING_ENABLED=true |
| Logging level | logging: { level: 'info' } | NEW_RELIC_LOG_LEVEL=info |
| Capture all request headers | allow_all_headers: true | NEW_RELIC_ALLOW_ALL_HEADERS=true |
| Enable error collection | error_collector: { enabled: true } | NEW_RELIC_ERROR_COLLECTOR_ENABLED=true |
Finally, here is also a reference of all the configuration variables you can include in your newrelic.js file, or translate into the env variables equivalent.