Get started with GraphQL Federation
Once you’ve created a Hive project of type Federation, you can start pushing your GraphQL Federation subgraph schemas to the Hive registry.
Learn more about GraphQL federation and its benefits.
This guide will walk you through the basics of schema pushing, checking, and spin up the Hive Gateway serving the federated GraphQL schema.
Prerequisites
For this guide, we are going to use the following Subgraphs that we are going to publish to Hive.
Note: If you want you can also use your own subgraphs instead of the ones we provide.
- users.graphql
- products.graphql
- reviews.graphql
We provide the actual URLs for these running subgraphs, so we can later on send some real GraphQL requests with our federation gateway.
- Users: https://federation-demo.theguild.workers.dev/users
- Products: https://federation-demo.theguild.workers.dev/products
- Reviews: https://federation-demo.theguild.workers.dev/reviews
Here’s the GraphQL schema (SDL) for every subgraph we are going to publish to Hive. Save these to files on your machine.
extend type Query {
  me: User
  user(id: ID!): User
  users: [User]
}

type User @key(fields: "id") {
  id: ID!
  name: String
  username: String
}Create Access Token
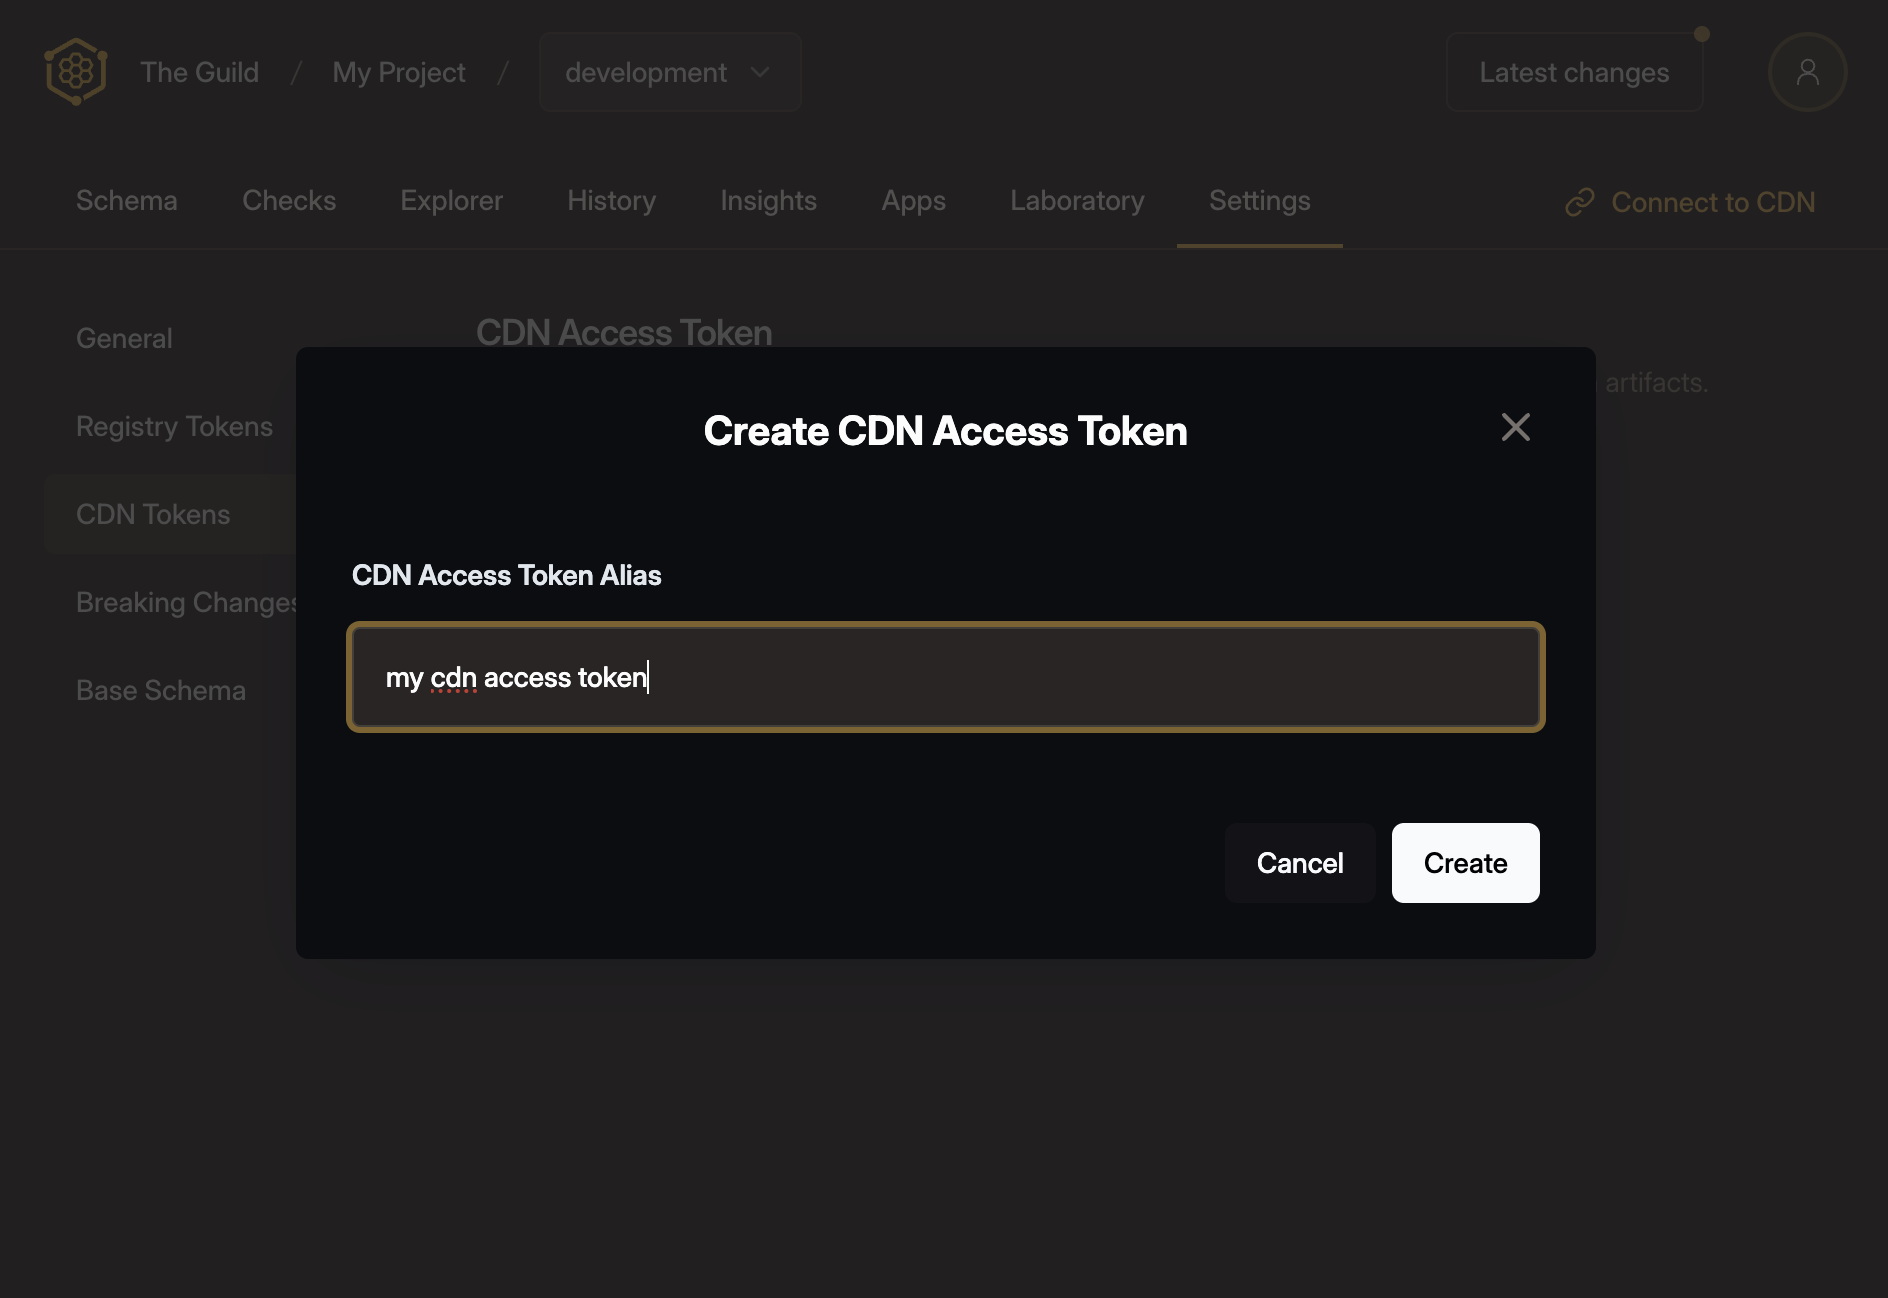
In order to publish our subgraph schemas to the schema registry, we first need to create an access token with the necessary permissions for the Hive CLI.
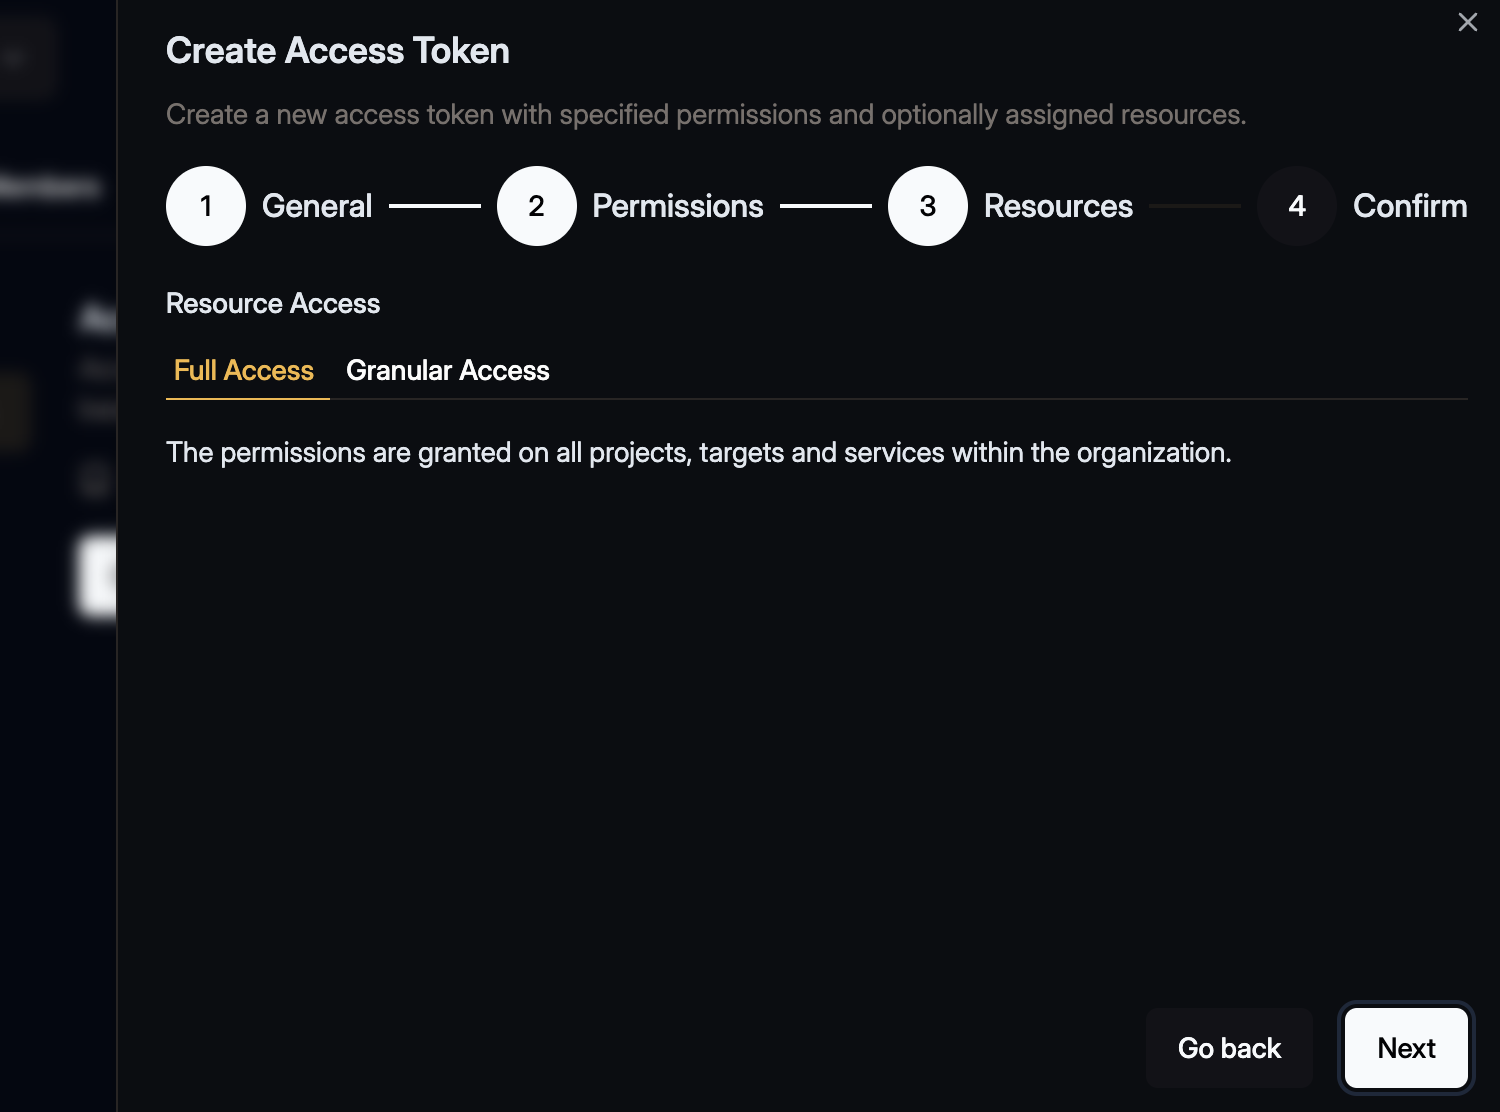
Within your organization, open the Settings tab and select the Access Token section.
Click Create new access token and enter a name for the access token.

Click Next and select Allowed for Check schema/service subgraph,
Publish schema/service/subgraph, and Report usage data.

Click Next and in the next step keep the Full Access selection for the resources. For the
purpose of this guide there is no need to further restirct the resources.
One last time click Next and review the access token.
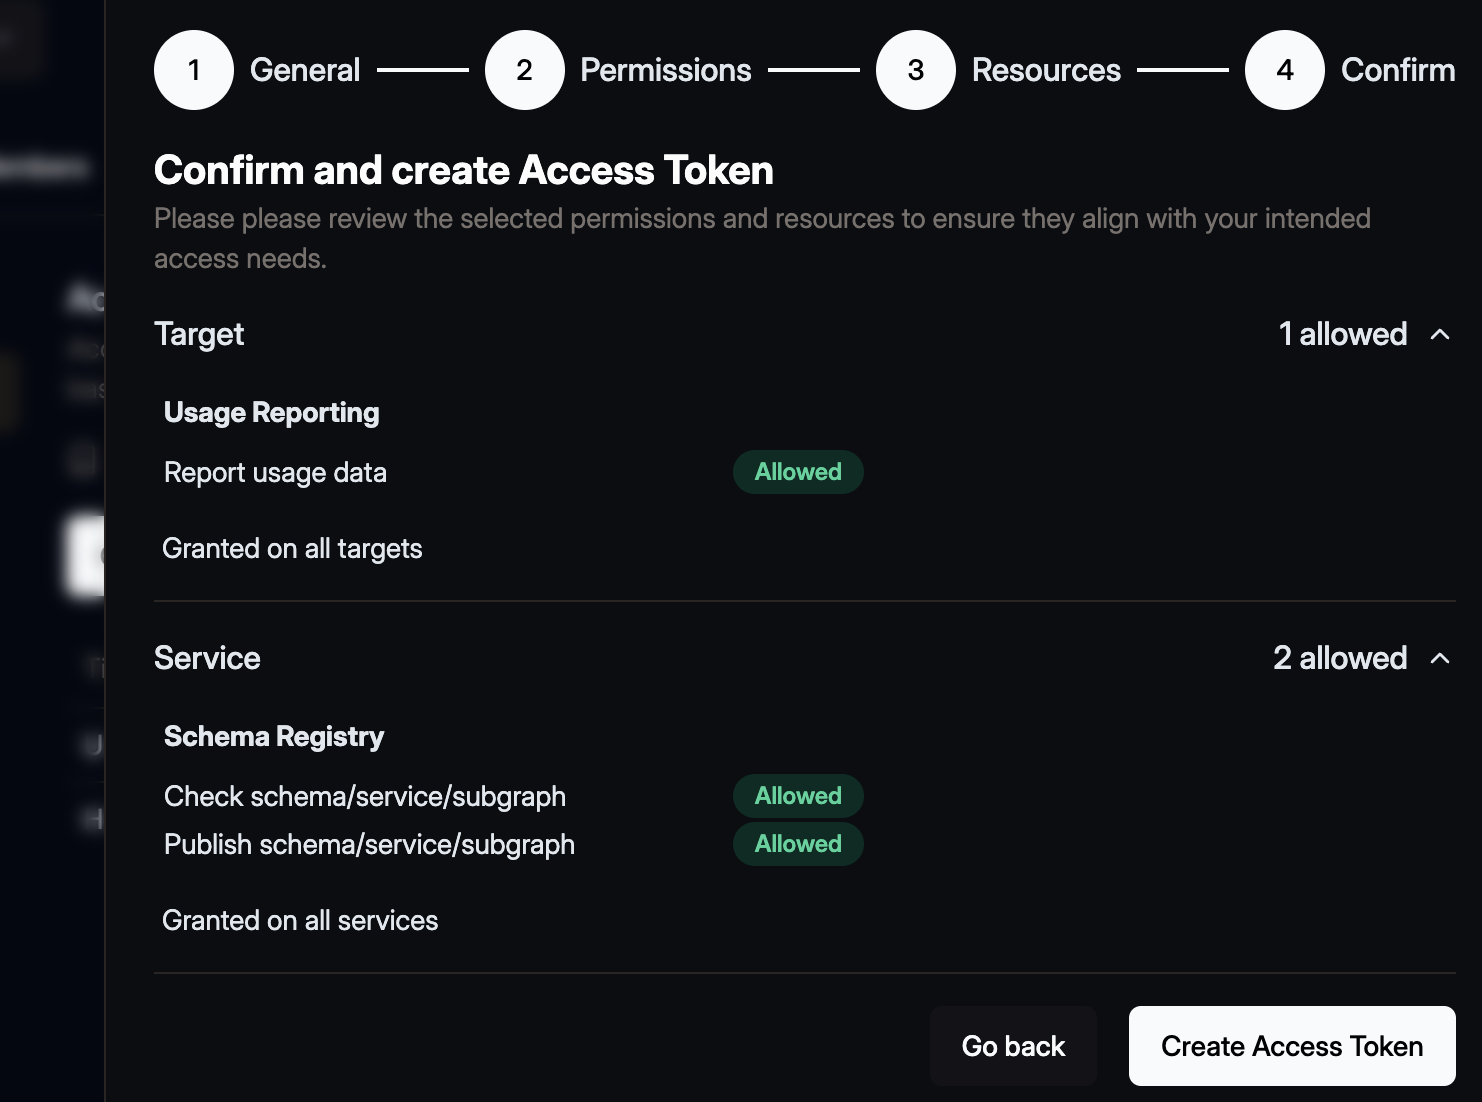
Then click the Create Access Token button. A confirmation dialogue will open that shows the you
generated token.
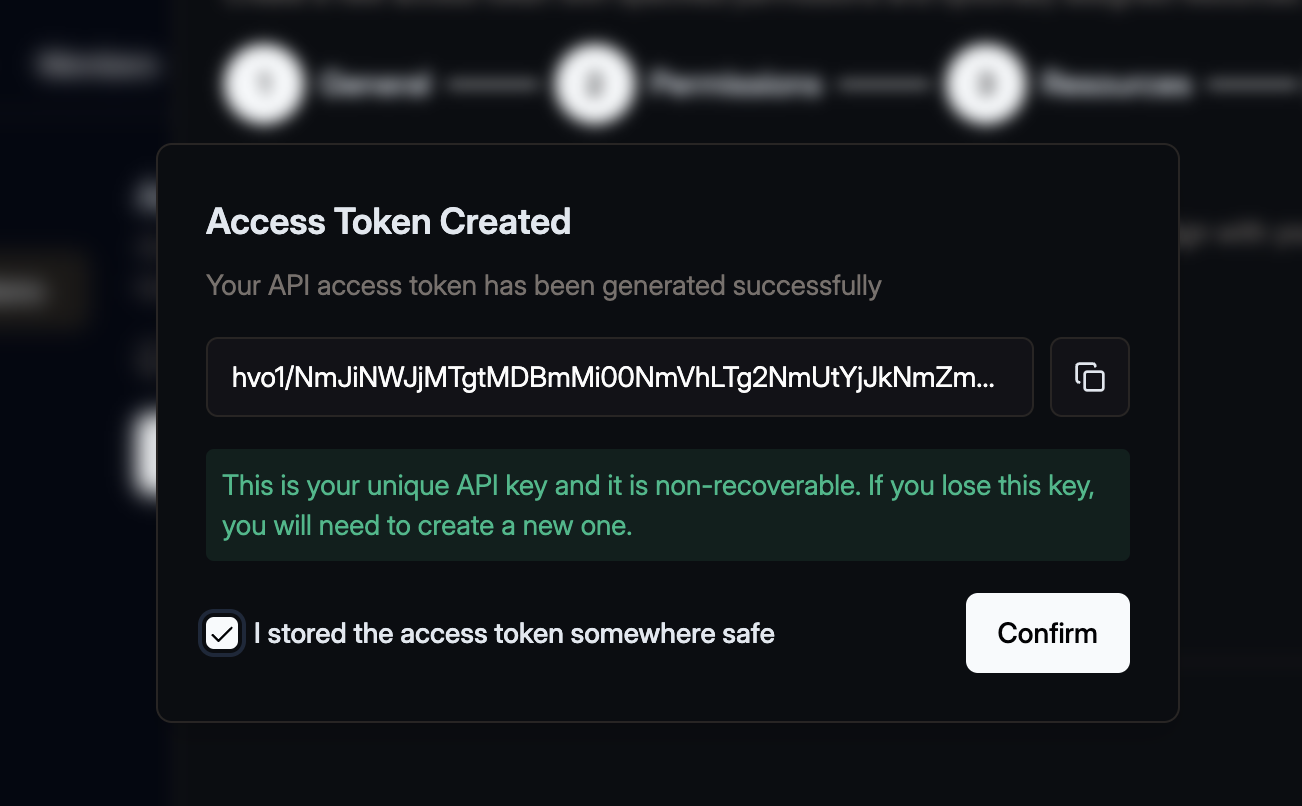
Make sure to copy your token and keep it safe. You won’t be able to see it again.
Publish subgraphs
As you may have noticed, Hive has created three targets under your project: development,
staging, and production. Each of these targets represent a different environment. You can remove
or create new targets as needed, for modelling the different environments of your project.
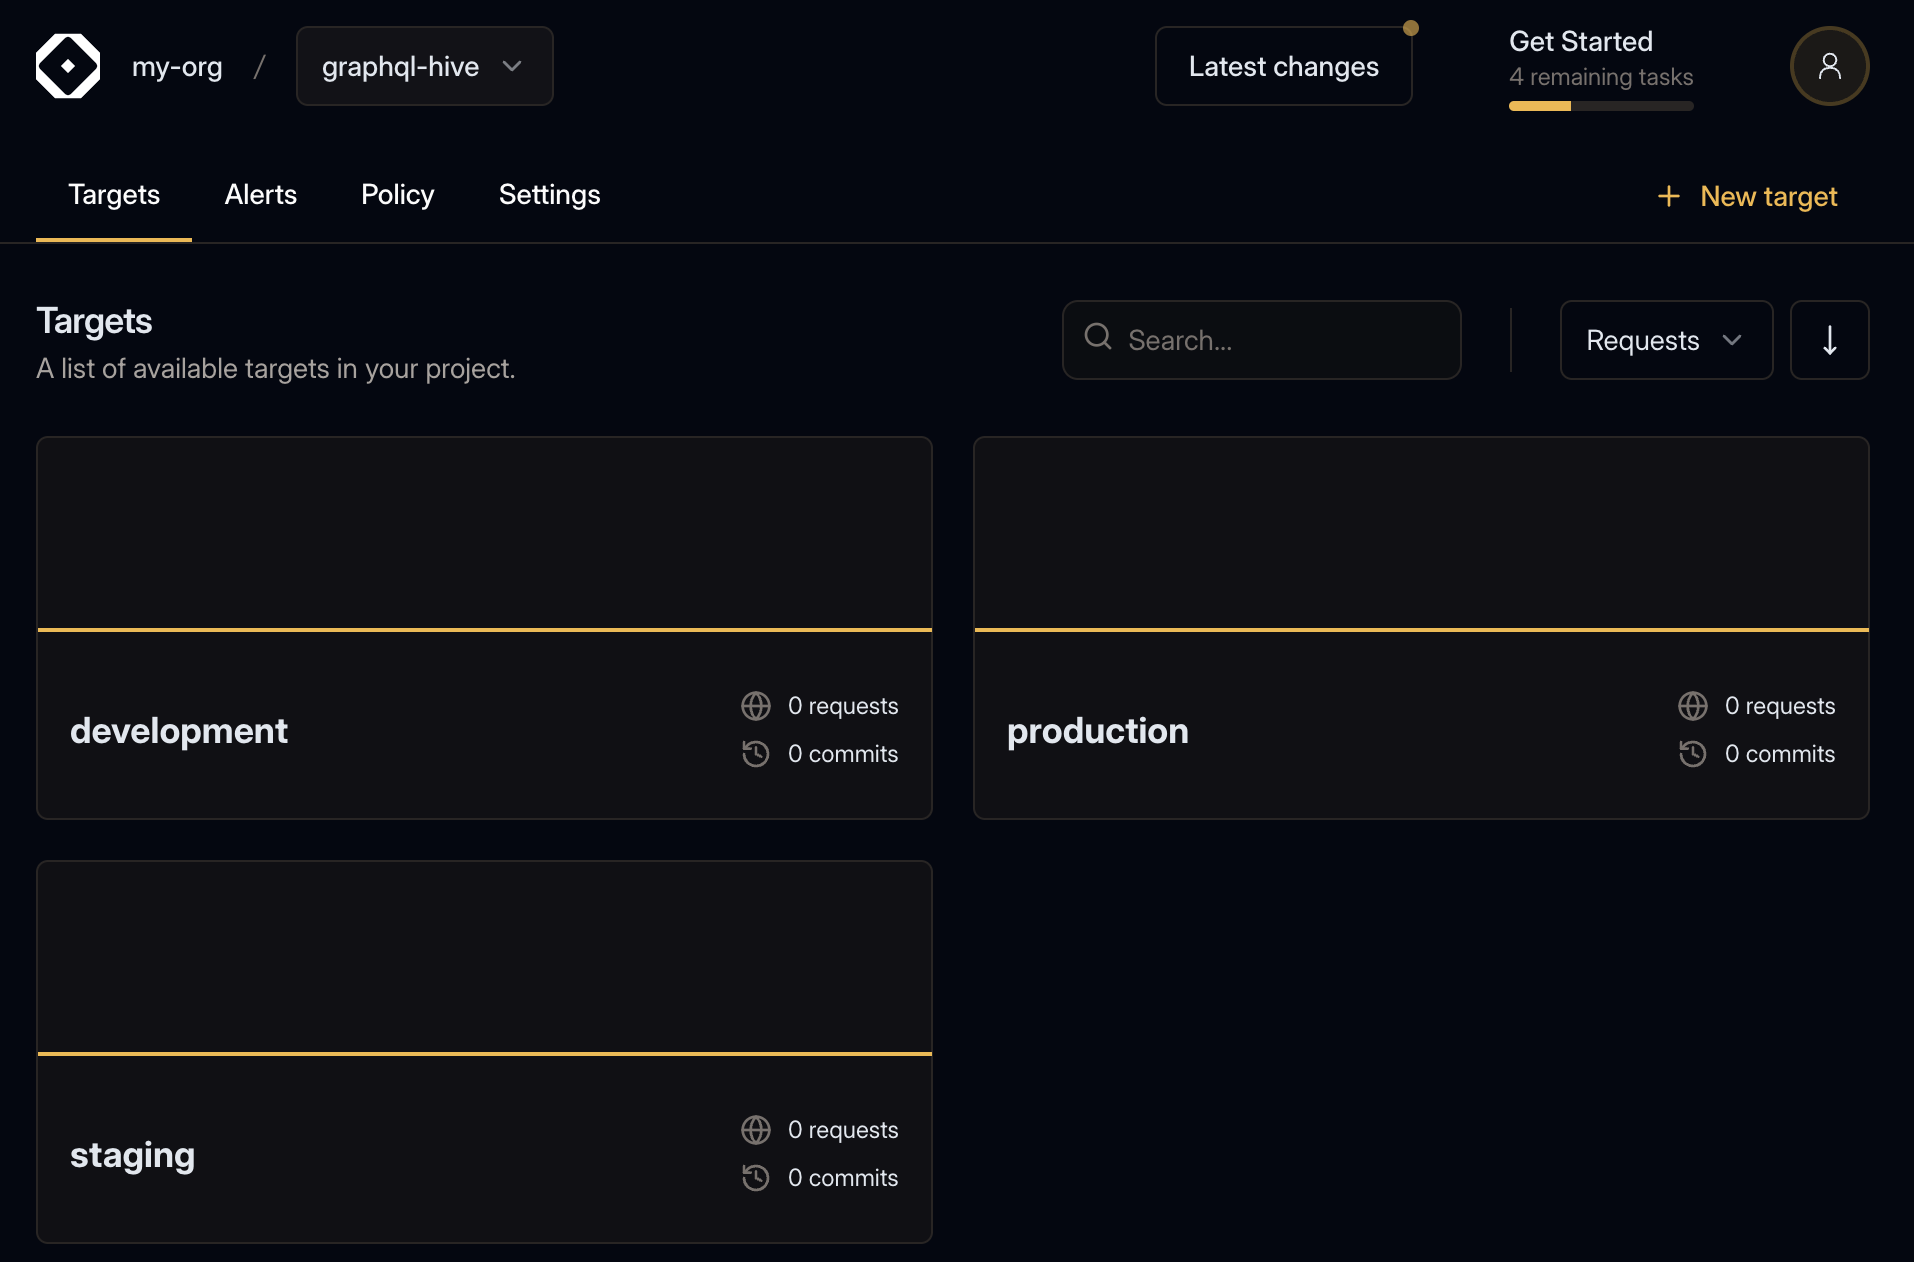
For this guide we will use the development target.
Now that you have your access token, and you have the base schema defined, you can publish your schema to the registry.
We’ll start with the Users subgraph.
If you did not yet copy the contents of the subgraphs/users.graphql to a local file, you can do so
now.
Run the following command in your terminal, to publish your subgraphs/users.graphql to the
registry.
- Replace
<YOUR_ORGANIZATION>with the slug of your organization - Replace
<YOUR_PROJECT>with the slug of your project within the organization - Replace
<YOUR_TOKEN_HERE>with the access token we just created.
hive schema:publish \
  --registry.accessToken "<YOUR_TOKEN_HERE>" \
  --target "<YOUR_ORGANIZATION>/<YOUR_PROJECT>/development" \
  --service "users" \
  --url "https://federation-demo.theguild.workers.dev/users" \
  --author "John Doe" \
  --commit "First Version" \
subgraphs/users.graphqlIf everything goes well, you should see the following output, containing a link pointing you to the schema version on the Hive dashboard.
✔ Published initial schema.If you’ll get to your target’s page on Hive dashboard, you should see that it was updated with the new schema you just published 🎉
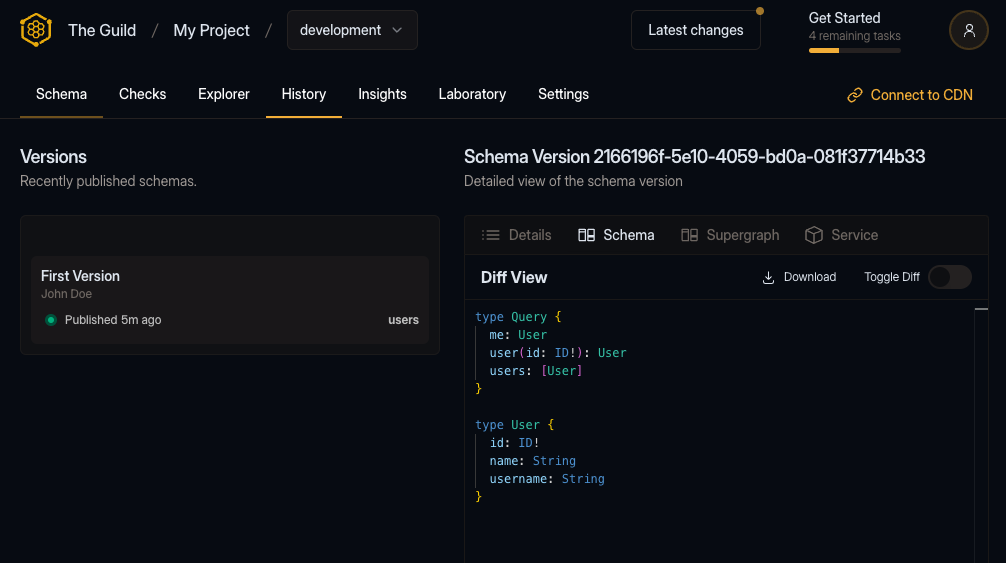
You should also check out the Explorer tab: you can see the schema you just published, and explore the API types, fields, and arguments.
Next, we will publish the Products subgraph schema to Hive. Again, let’s start by copying the schema to a local file.
hive schema:publish \
  --registry.accessToken YOUR_TOKEN_HERE \
  --target "<YOUR_ORGANIZATION>/<YOUR_PROJECT>/development" \
  --service "products" \
  --url "https://federation-demo.theguild.workers.dev/products" \
  --author "John Doe" \
  --commit "Second Version" \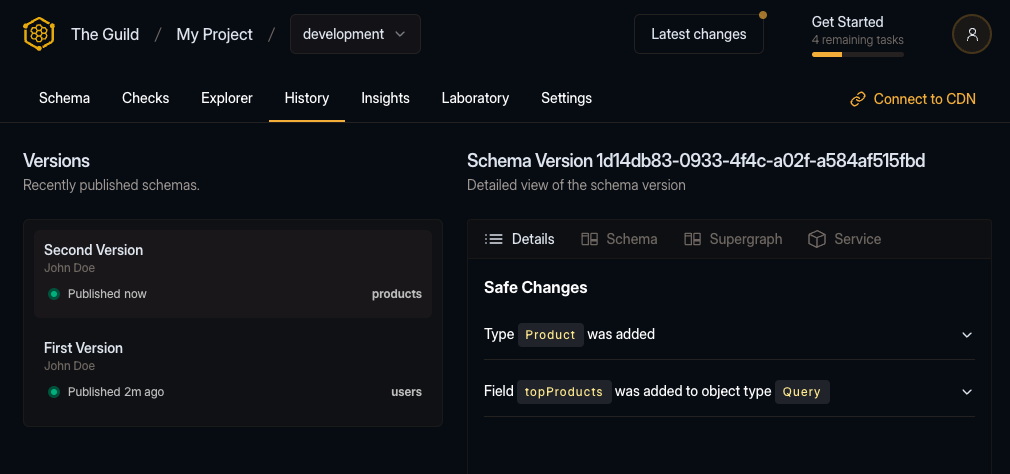
subgraphs/products.graphqlIf everything goes well, you should see the following output:
✔ Schema publishedAfter the publish process, if we had over to the Hive dashboard, we can see our new schema version published.
Last, we will publish the Reviews subgraph schema to Hive. Again, let’s start by copying the schema to a local file.
Then, we run the following command in your terminal.
hive schema:publish \
  --registry.accessToken YOUR_TOKEN_HERE \
  --target "<YOUR_ORGANIZATION>/<YOUR_PROJECT>/development" \
  --service "reviews" \
  --url "https://federation-demo.theguild.workers.dev/reviews" \
  --author "John Doe" \
  --commit "My second commit" \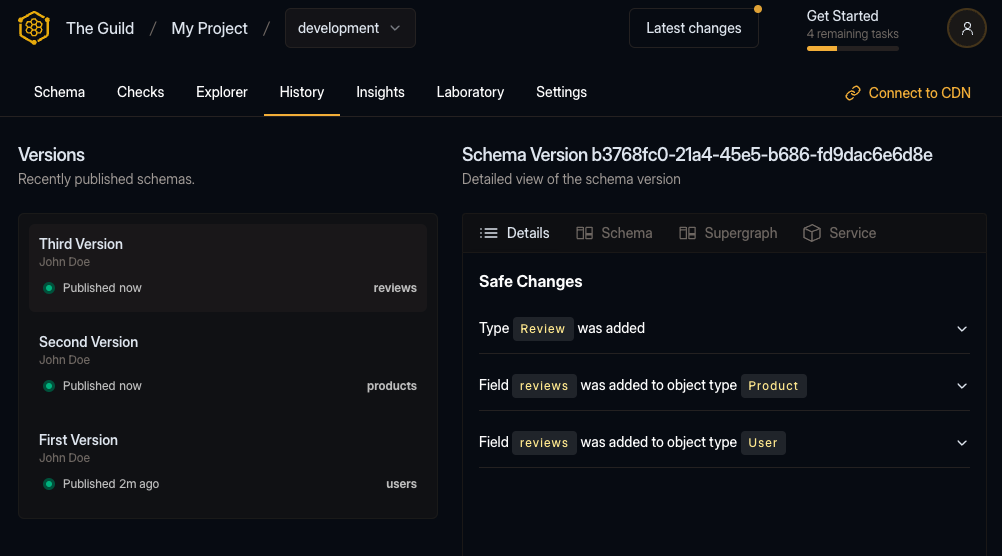
subgraphs/reviews.graphqlAgain, if everything goes well, you should see the following output:
✔ Schema publishedOn your target’s Explorer page now, you’ll be able to see the schema of all three subgraphs 🎉
Congratulations on publishing and composing your first subgraphs with the Hive schema registry!
Gateway
The next step is to spin up our GraphQL gateway that will serve the federated GraphQL schema composed out of the subgraphs we published to the Hive schema registry.
The gateway will delegate the requests from the clients to the appropriate subgraph services, and then merge the results into a single response.
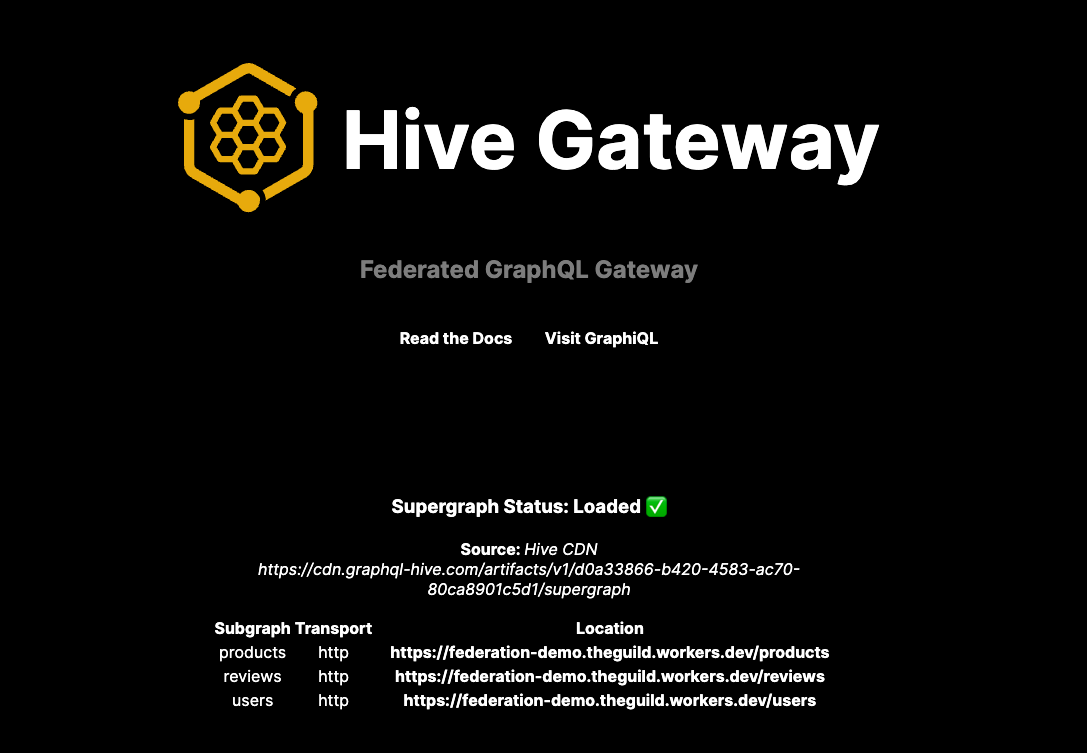
The Hive schema registry publishes the supergraph (artifact of the composed schemas that contains all the information about the subgraphs and fields available) to the high-availability CDN on Cloudflare.
The gateway can poll the supergraph from the CDN and serve the composed GraphQL schema.
CDN Access
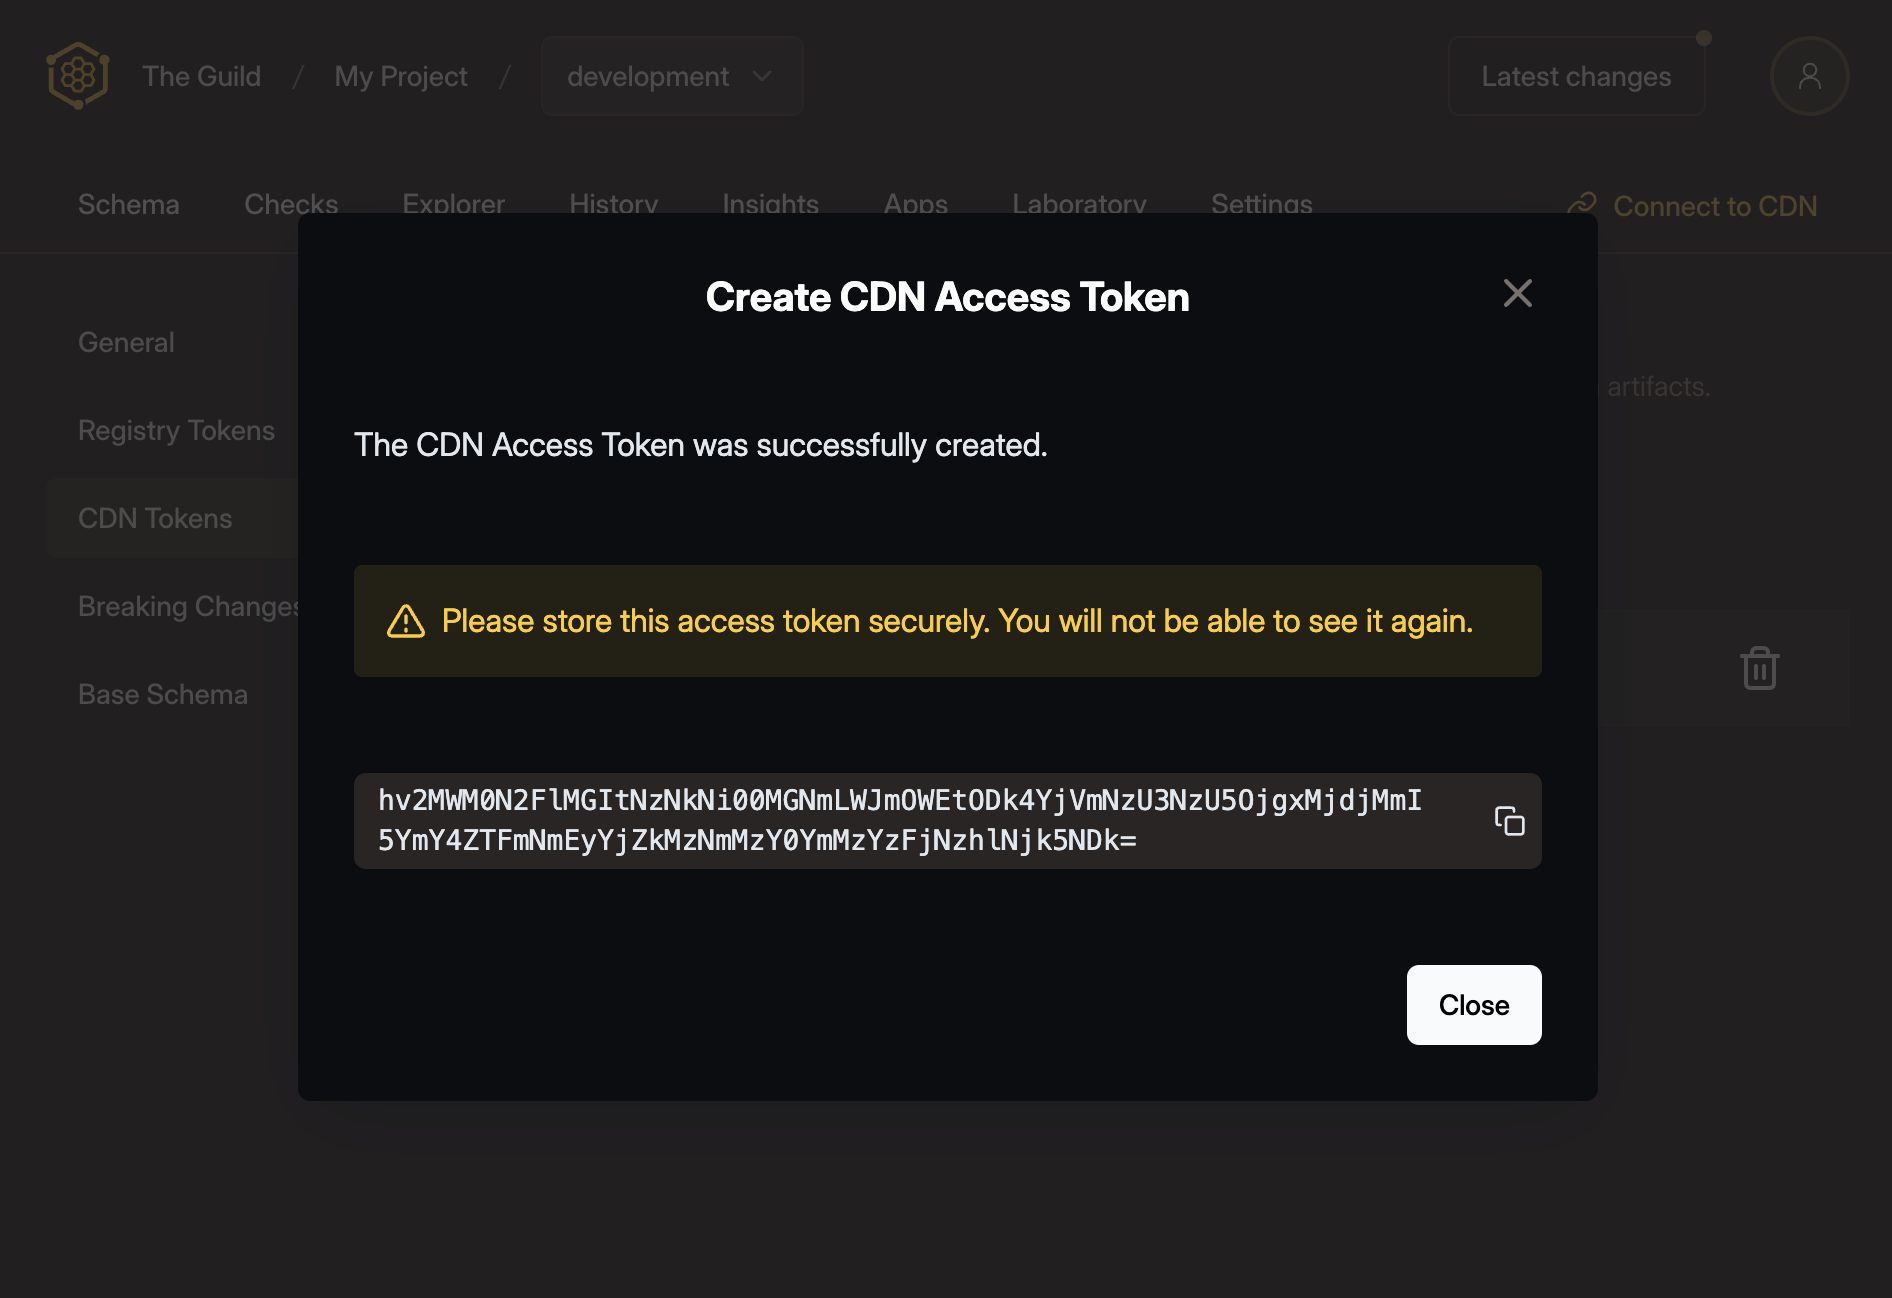
For accessing the supergraph, we need to create the CDN access token from the Hive dashboard.
Navigate to your target’s settings page and select the CDN Tokens tab.
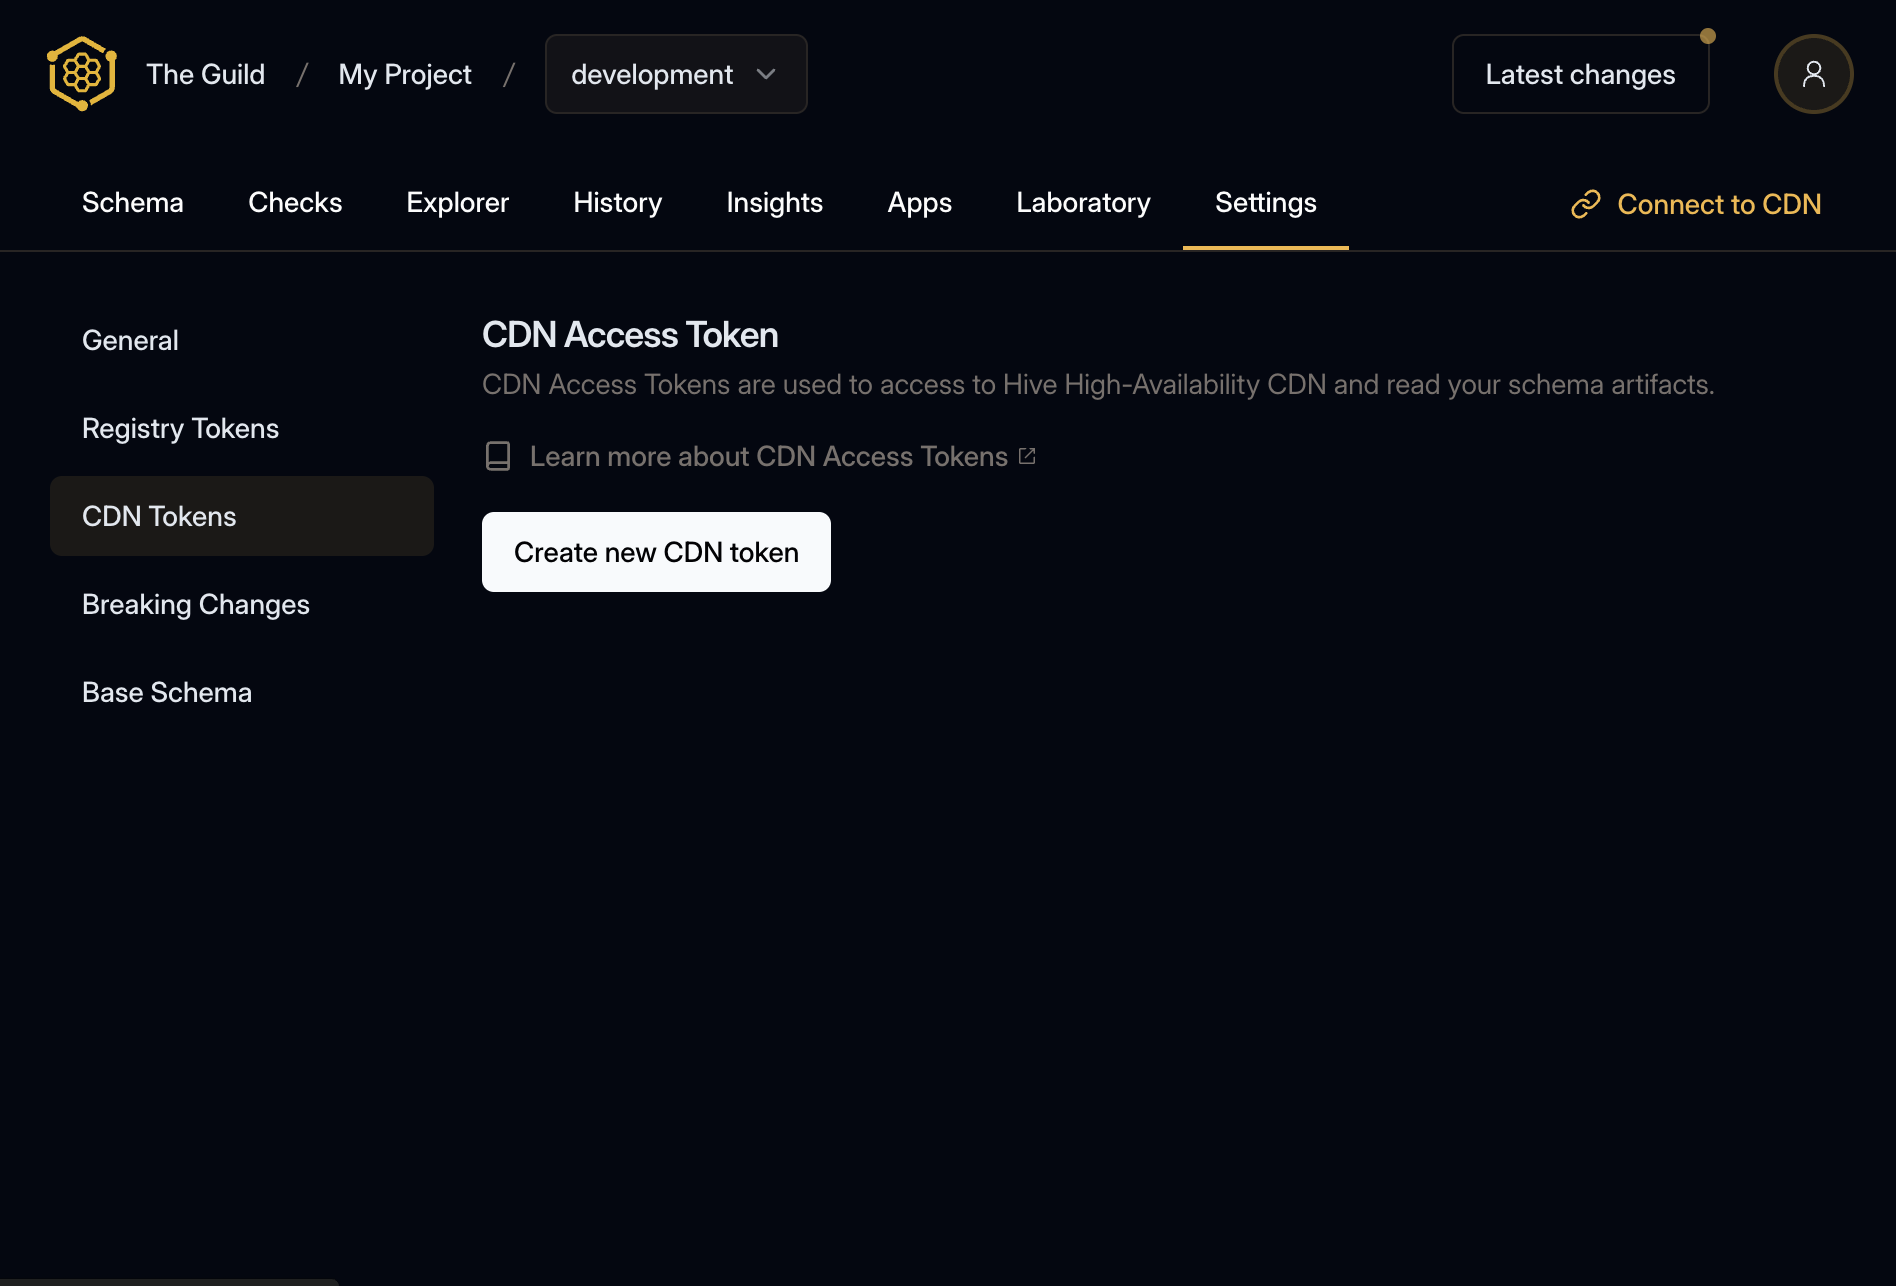
Click the Create new CDN token button, give your token a name and click Create.
There will be a confirmation screen showing the CDN token you just created. Make sure to copy it and keep it safe.
Run the gateway
Hive platform supports two orchestrators for GraphQL Federation: Hive Gateway (JavaScript) and Hive Router (Rust). They provide the same core functionality but differ in performance characteristics and runtime.
Hive Gateway is the Federation Gateway that seamlessly integrates with the Hive registry. You can run Hive Gateway either as a Docker image, binary or NPM package.
The single executable binary for the Hive Gateway is available without any dependencies. You can download and setup the binary on your machine.
curl -sSL https://graphql-hive.com/install-gateway.sh | shThen you can run the Hive Gateway with the following command.
hive-gateway supergraph \
  "https://cdn.graphql-hive.com/artifacts/v1/<target_id>" \
--hive-cdn-key "<hive_cdn_access_key>"| Parameter | Description |
|---|---|
hive_cdn_endpoint | The endpoint of your Hive target |
hive_cdn_access_key | The Hive CDN access key |
If you now navigate to http://localhost:4000, you should see the Hive Gateway page with
information about the supergraph and subgraphs.
Now, if you navigate to http://localhost:4000/graphql, you should see the GraphiQL interface where
you can write and execute queries against the supergraph.
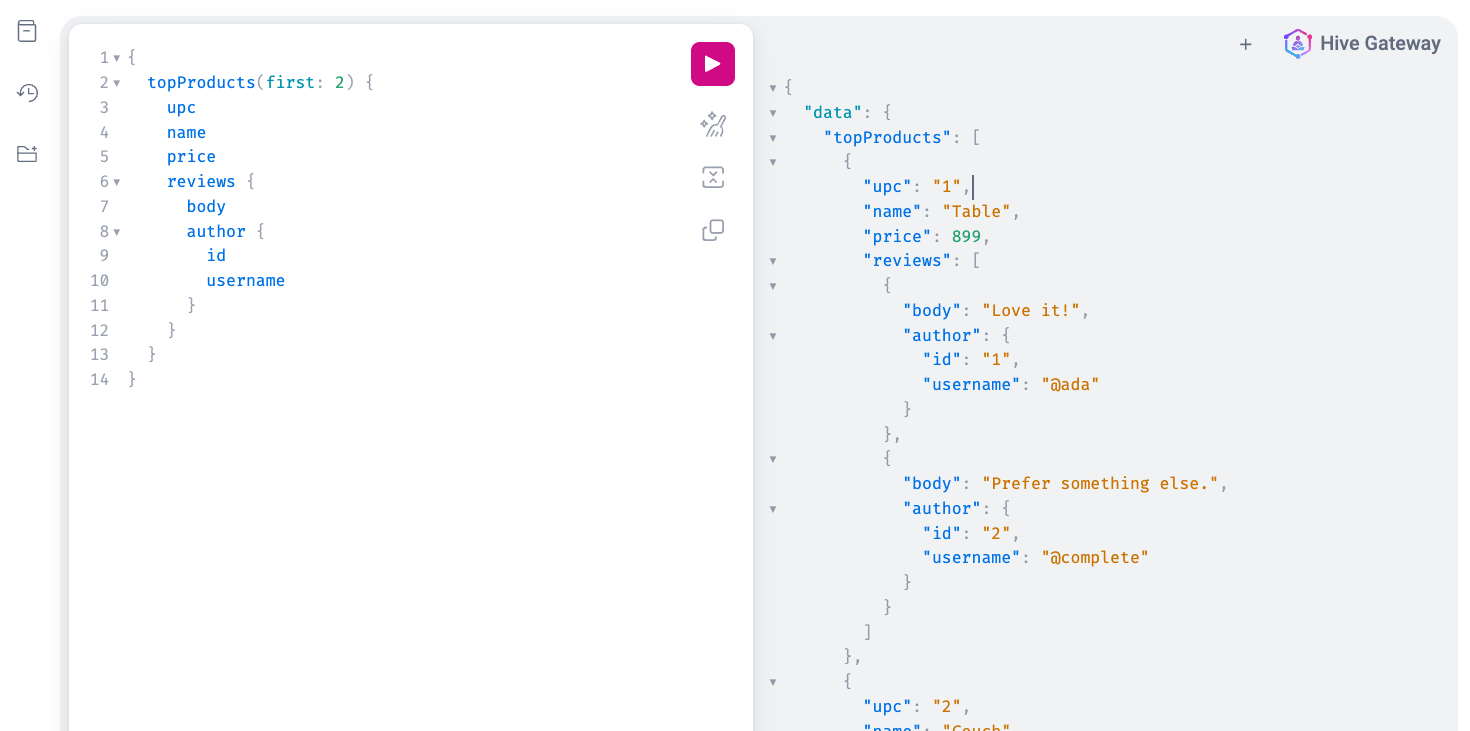
Here you can execute GraphQL operations against the supergraph, which will be delegate to the single subgraph services.
Here is a sample query to execute:
query TopProductsWithReview {
  topProducts(first: 2) {
    upc
    name
    price
    reviews {
      body
      author {
        id
        username
      }
    }
  }
}Usage reporting
Up next let’s report the usage from our gateway to the registry, so we can see on the dashboard how the API is being used.
For this, we will reuse the previously create access token that already has the Report usage data
permissions.
You will also need to know the target ID of your project’s target.
Target can either be an UUID or a slug following the format
$organizationSlug/$projectSlug/$targetSlug:
the-guild/graphql-hive/staginga0f4c605-6541-4350-8cfe-b31f21a4bf80
Be aware that using the UUID is more resilient in case you rename either your organization, project or target.
hive-gateway supergraph \
"https://cdn.graphql-hive.com/artifacts/v1/<target_id>" \
--hive-cdn-key "<hive_cdn_access_key>" \
--hive-target "<hive_usage_target>" \
--hive-access-token "<hive_usage_access_token>"| Parameter | Description |
|---|---|
<target_id> | The ID of your Hive target |
<hive_cdn_access_key> | The Hive CDN access key |
<hive_usage_target> | The registry target which the usage data should be reported to |
<hive_registry_token> | The Hive registry token for usage reporting |
After starting the gateway with the usage reporting token, we can now execute some queries using the built-in GraphiQL interface.
query TopProductsWithReview {
  topProducts(first: 2) {
    upc
    name
    price
    reviews {
      body
      author {
        id
        username
      }
    }
  }
}After executing the query, a few times, let’s switch back to the Hive dashboard and navigate to the insights page.
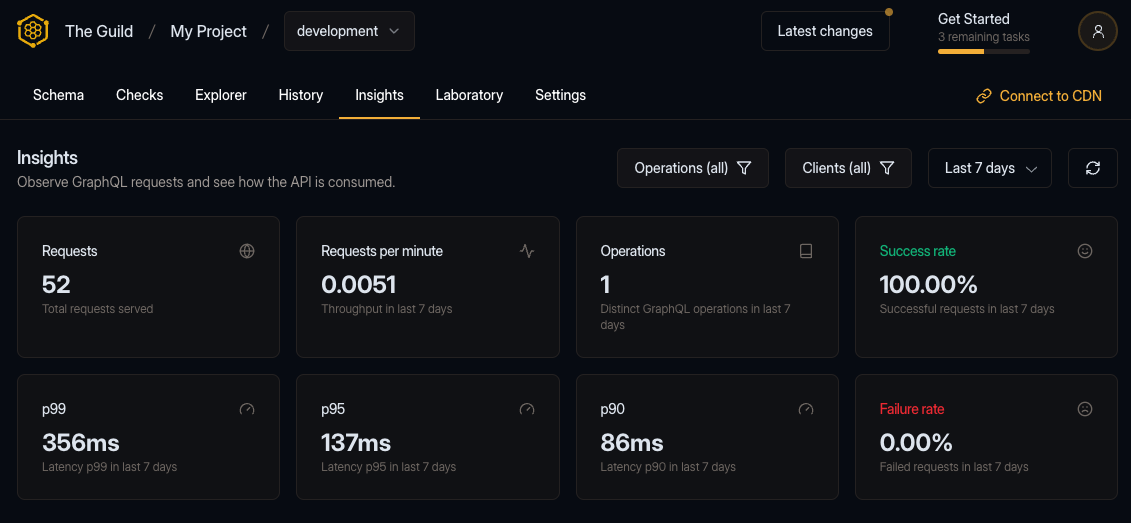
Here we can now see the GraphQL operations from our gateway being reported to the registry.
Schema checks
Hive can perform several checks on your schema before publishing it to the registry. You can use Hive CLI to run these check and find potential breaking changes or composition issues.
To see how schema checks works, let’s make a small change to our local schema file. First, we’ll
start with a non-breaking change - we’ll add a new field to the Review type under the Reviews
subgraph:
type Review @key(fields: "id") {
  id: ID!
  body: String
  author: User @provides(fields: "username")
  product: Product
  verified: Boolean # new field added
}

extend type User @key(fields: "id") {
  id: ID! @external
  username: String @external
  reviews: [Review]
}

extend type Product @key(fields: "upc") {
  upc: String! @external
  reviews: [Review]
}
Now, run the Hive CLI with the schema:check command and your modified subgraphs/reviews.graphql
file:
hive schema:check \
  --registry.accessToken "<YOUR_TOKEN_HERE>" \
  --target "<YOUR_ORGANIZATION>/<YOUR_PROJECT>/development" \
  --service "reviews" \
subgraphs/reviews.graphqlYou should see that Hive successfully detect the change you made, and exists with a 0 exit code,
meaning that the schema is compatible, valid and has no breaking changes:
ℹ Detected 1 change

- Field verified was added to object type Review
Now, are going to try introduce a breaking change. To do that, we’ll rename an existing field in the GraphQL schema of the Reviews subgraph:
type Review @key(fields: "id") {
  id: ID!
  bodyContents: String # renamed from body
  author: User @provides(fields: "username")
  product: Product
}

extend type User @key(fields: "id") {
  id: ID! @external
  username: String @external
  reviews: [Review]
}

extend type Product @key(fields: "upc") {
  upc: String! @external
  reviews: [Review]
}hive schema:check \
--registry.accessToken "<YOUR_TOKEN_HERE>" \
--target "<YOUR_ORGANIZATION>/<YOUR_PROJECT>/development" \
--service "reviews" \
subgraphs/reviews.graphqlIn that case, you’ll notice that Hive CLI exists with a 1 exit code, meaning that the schema has
breaking changes, and it’s not compatible with the current schema in the registry:
✖ Detected 1 error
- Breaking Change: Field rating was removed from object type Review
ℹ Detected 2 changes
- Field rating was removed from object type Review
- Field averageRating was added to object type ReviewIn addition to detecting simple breaking changes, Hive is capable of detecting composability and compatibility issues across your subgraphs. To see how it works, let’s make a small change to our schema.
We are going to add a conflict to the Reviews service. We are going to add a new field (price)
to the Product type, that conflicts with the Products type in the Products service.
type Review @key(fields: "id") {
id: ID!
body: String
author: User @provides(fields: "username")
product: Product
}
extend type User @key(fields: "id") {
id: ID! @external
username: String @external
reviews: [Review]
}
extend type Product @key(fields: "upc") {
upc: String! @external
reviews: [Review]
price: String # type conflicts with the products subgraph
}Run the Hive CLI with the schema:check command again and the modified subgraphs/reviews.graphql
file:
hive schema:check \
  --registry.accessToken "<YOUR_TOKEN_HERE>" \
  --target "<YOUR_ORGANIZATION>/<YOUR_PROJECT>/development" \
  --service "reviews" \
subgraphs/reviews.graphqlAnd now you can see that the schema check process has failed, due to conflicts and inconsistencies between the schemas:
✖ Detected 2 errors

- Breaking Change: Field Product.price changed type from Price to Int
- [reviews] Product.price - Product.price already exists in the schema. It cannot also be defined in this type extension. If this is meant to be an external field, add the $(@external) directive. > Field

ℹ Detected 1 change

- Field Product.price changed type from Price to Int
As you can see schema checks can help you to catch potential issues before you publish your schema to the registry.
Usually, you would run these checks in your subgraphs CI pipeline, to ensure that your subgraph schema integrates flawlessly with the other subgraphs in the federation project, where schema publishes are made within the Continuous Deployment (CD) pipeline to actually publish the latest subgraph version to the schema registry.
Next Steps
Congratulations on publishing your first subgraph schemas to the Hive schema registry, composing your supergraph, spinning up your own Federation Gateway serving the unified GraphQL schema and reporting the usage data!
From here you can continue to explore the Hive dashboard, or dive deeper into the documentation to learn about all the features of the Hive platform.