OIDC Login
By default Hive allows you to login using a email and password. However, you can also enable OIDC (often refered to as social login). This allows you to login using a third party provider such as GitHub and Google.
Don’t confused OIDC Login with organization scoped OIDC login. If you want to automatically add users and restrict their access to your organization based on their OIDC login, you need to follow the organization scoped OIDC login guide instead.
GitHub
First, you need to create a new GitHub application on https://github.com/settings/applications/new
For the Homepage URL option full in the web app base URL (e.g. https://app.graphql-hive.com).
For the Authorization callback URL option use the web app base URL followed by
/auth/callback/github (e.g. https://app.graphql-hive.com/auth/callback/github)`.
Create the app and generate a new client secret.
Then, you need to add the following environment variables for your Hive app instance:
AUTH_GITHUB=1
AUTH_GITHUB_CLIENT_ID=741784e6331a404eaXXX                         # use the one of your app
AUTH_GITHUB_CLIENT_SECRET=e43e123dd54de2b56126dc4afc4491dbbba6bXXX # use the you just created
Now the Sign Up with GitHub button should be visible on the login page.
First, you need to create a new Google OIDC application following this guide: https://support.google.com/cloud/answer/6158849
For the Homepage URL option full in the web app base URL (e.g. https://app.graphql-hive.com).
For the Authorization callback URL option use the web app base URL followed by
/auth/callback/google (e.g. https://app.graphql-hive.com/auth/callback/google)`.
Then, you need to add the following environment variables for your Hive app instance:
AUTH_GOOGLE=1
AUTH_GOOGLE_CLIENT_ID=741784e6331a404eaXXX                         # use the one of your app
AUTH_GOOGLE_CLIENT_SECRET=e43e123dd54de2b56126dc4afc4491dbbba6bXXX # use the you just created
Now the Sign Up with Google button should be visible on the login page.
Okta
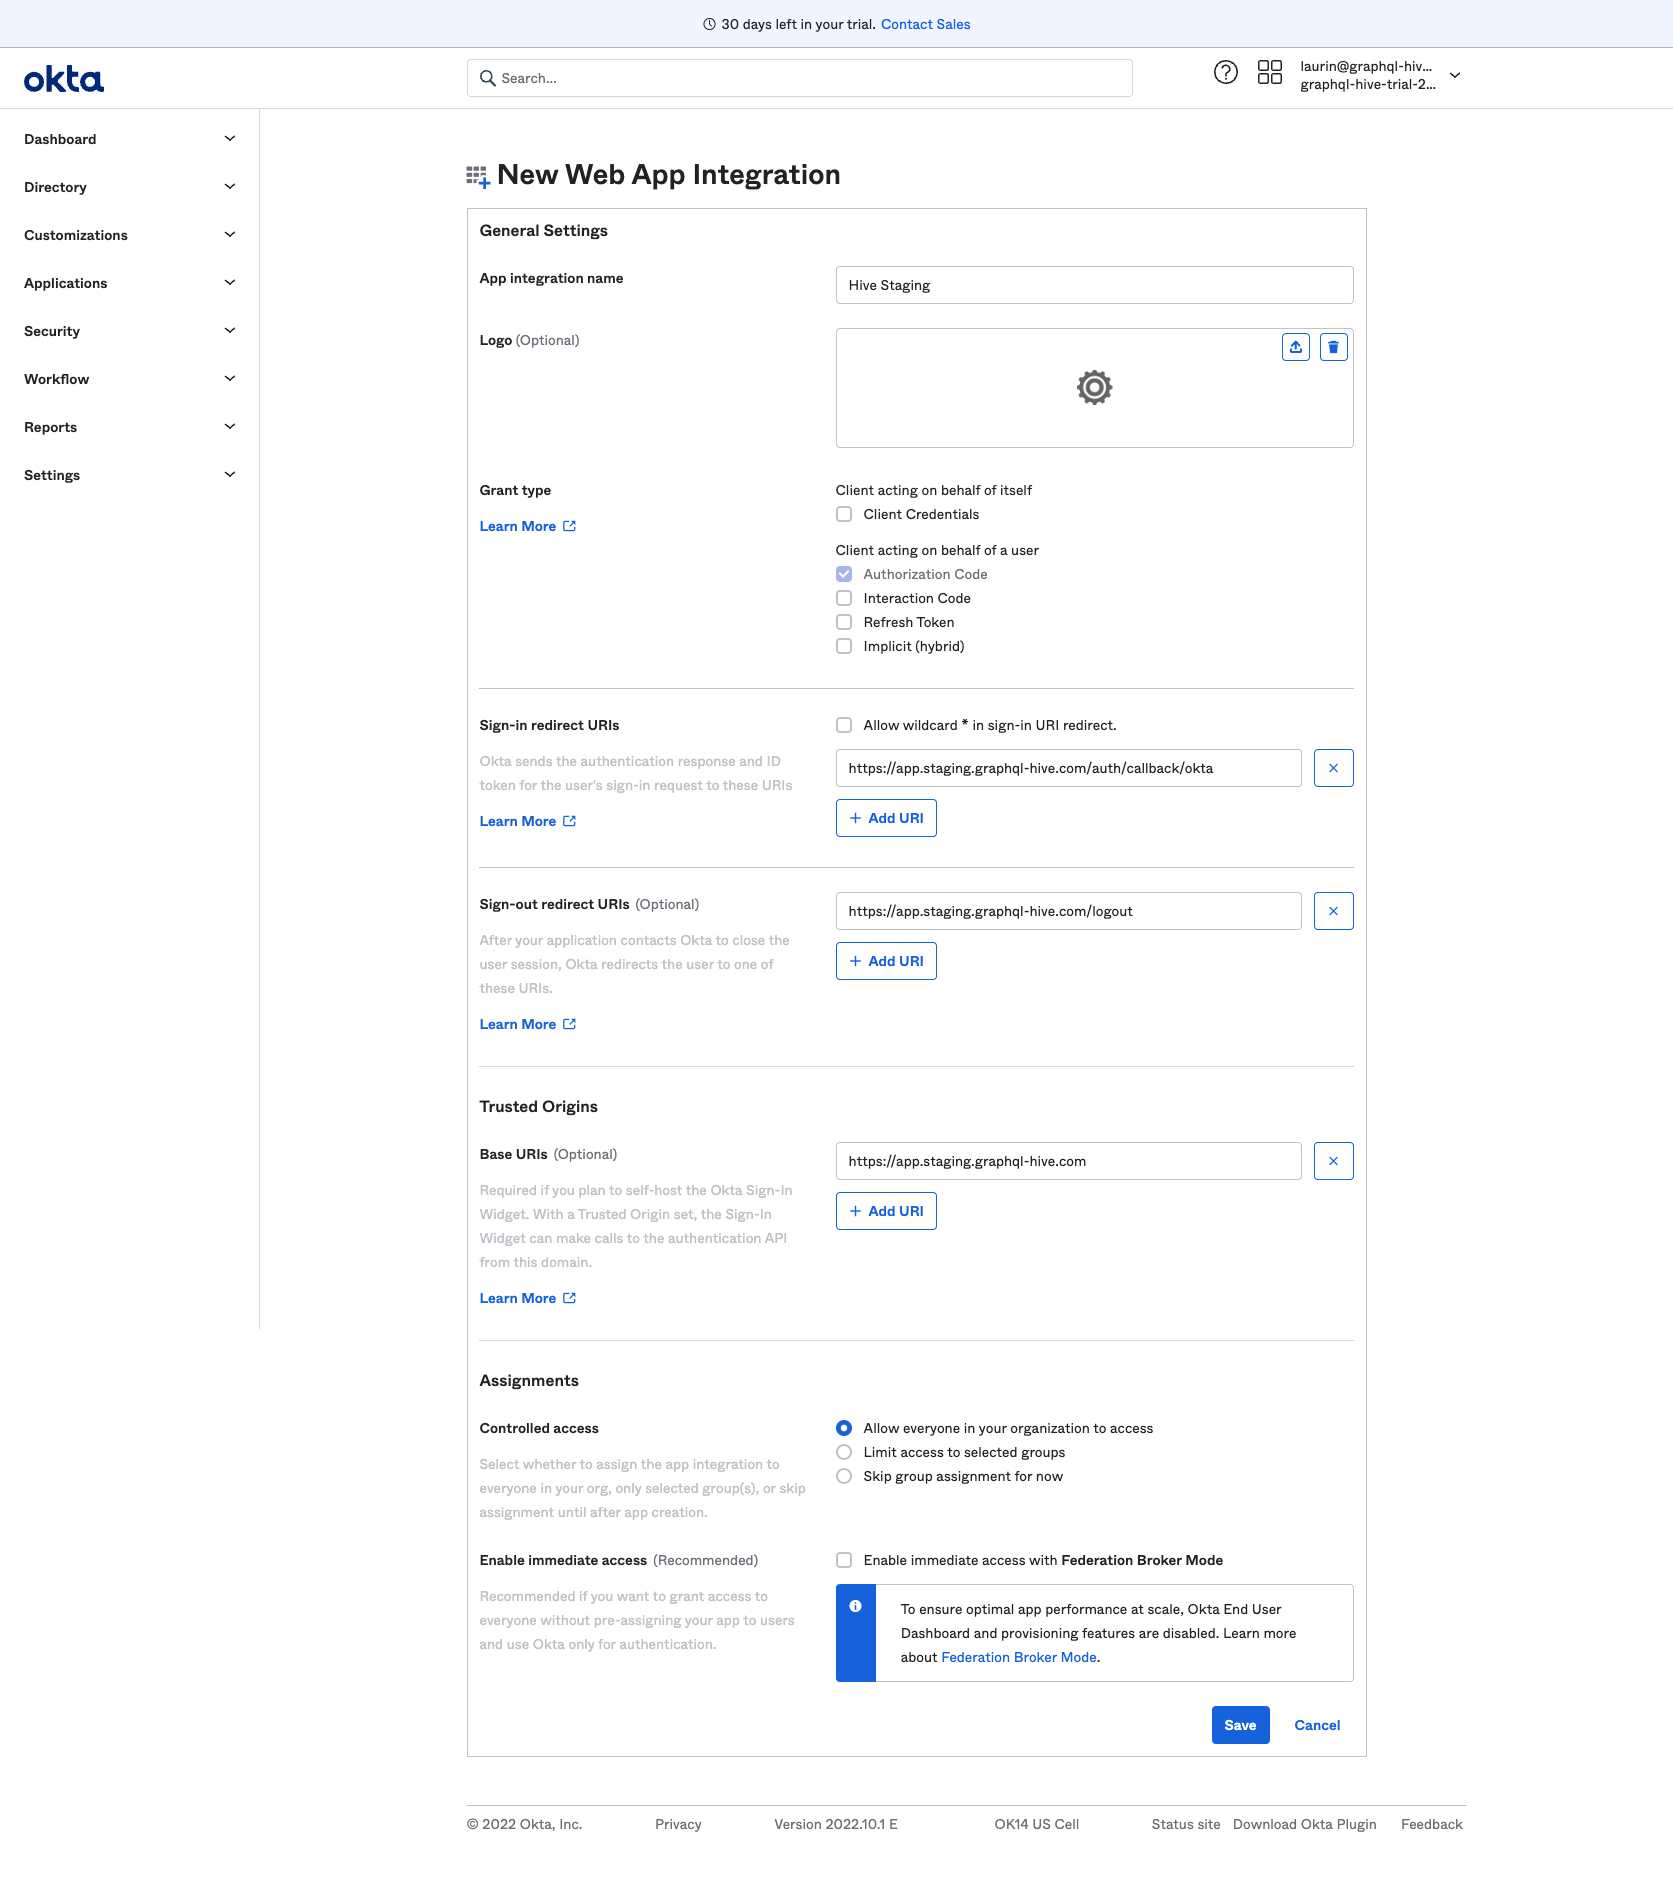
First, you need to create a new Okta OIDC application within your admin dashboard.
For the Sign-in redirect URIs option full in the web app base url followed by
/auth/callback/okta (e.g. https://app.graphql-hive.com/auth/callback/okta).
For the Sign-out redirect URIs option full in the web app base url followed by /auth/logout
(e.g. https://app.graphql-hive.com/logout).
For the Trusted Origins option full in the web app base url (e.g. https://app.graphql-hive.com).
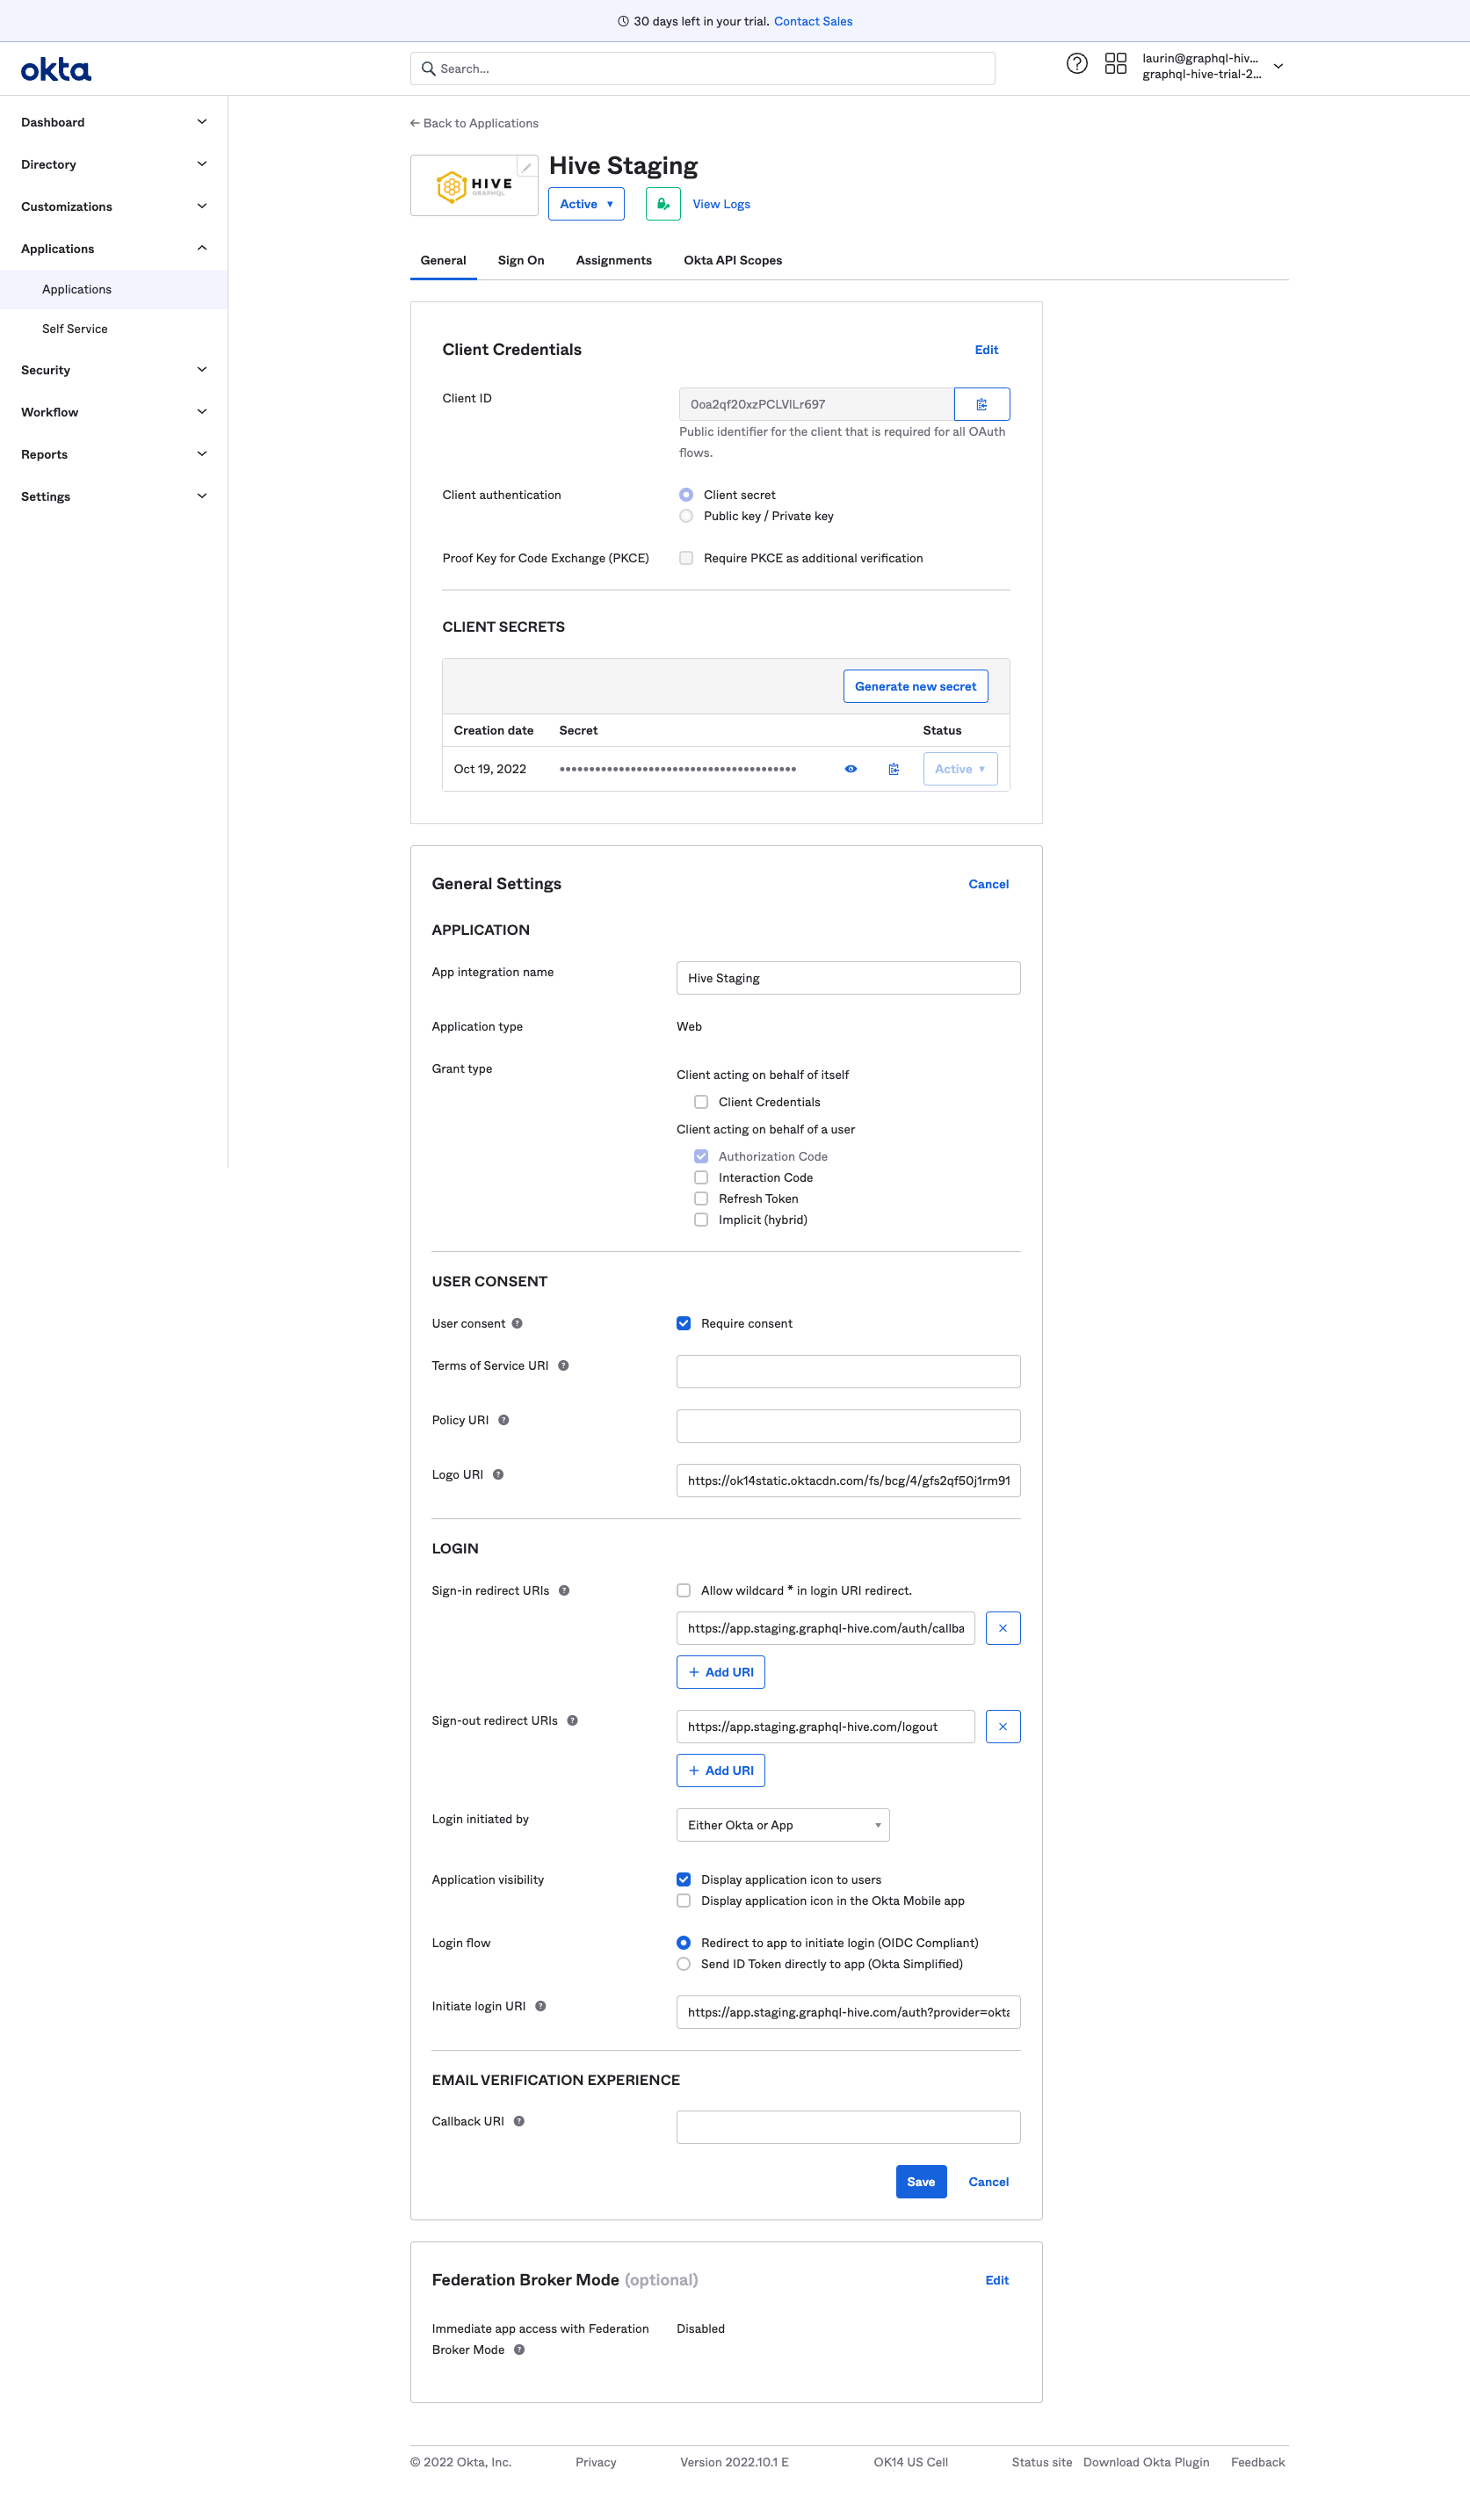
Afterwards, open the General tab of the created app and adjust the General settings as follows:
In the LOGIN section, set the Login initiated by field to Either Okta or App. In the LOGIN
section, set the Application visibility field to Display application icon to users. In the
LOGIN section, set the Login flow field to Redirect to app to initiate login (OIDC Compliant).
In the LOGIN section, set the Login Initiate login URI field to the web app base url followed by
/auth?provider=okta (e.g. https://app.graphql-hive.com/auth?provider=okta).
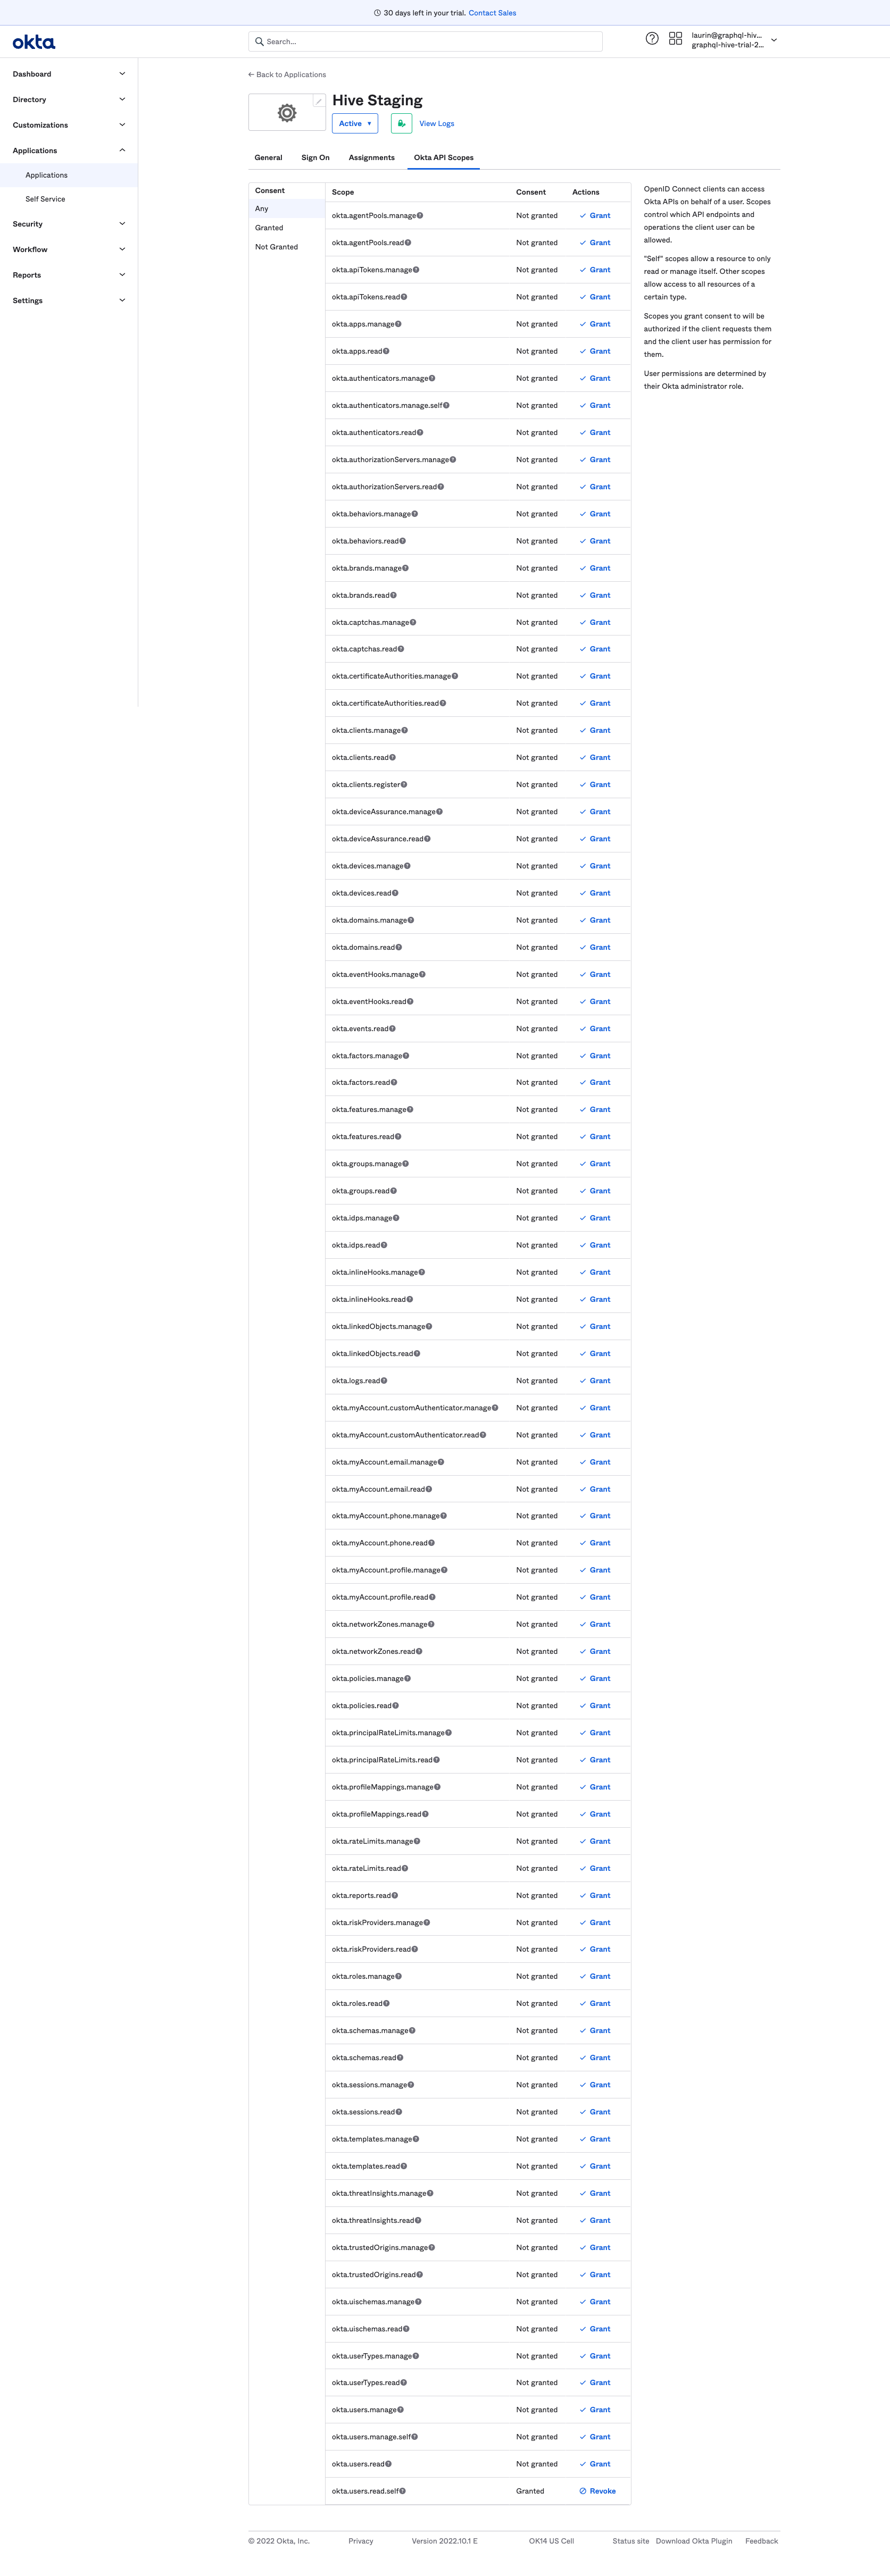
Last, switch over to the Okta API Scopes tab and grant access to the okta.users.read.self scope.
Then, you need to add the following environment variables for your Hive app instance:
AUTH_OKTA=1
# set to 1 if you want to hide the login button and only allow login via the Okta dashboard link
AUTH_OKTA_HIDDEN=0
# your org url (not the admin one)
AUTH_OKTA_ENDPOINT=https://dev-1234566789.okta.com
# client id of the application you just created
AUTH_OKTA_CLIENT_ID=0XXXwXXXX6fEpeXXXXXX
# client secret of the application you just created
AUTH_OKTA_CLIENT_SECRET=JhW3jf2hXXXP3rXXXiRyhtaXXXXX-aGicEtXXXXX
You should now be able to log into Hive using the Okta dashboard link of your created application.
The Login with Okta button should be visible on the login page - dependent on whether you set
AUTH_OKTA_HIDDEN to 0 or 1.